In Windows Server 2003, data is stored in disks and volumes. A disk is the primary storage device, on which you can create multiple partitions to store data in an organized manner. Each partition of a disk is called a volume and a collection of more than one volume of the same or different disk forms a volume set.
Redundant Array of Independent Disks (RAID) is a collection of more than one disk that stores redundant data. When you write data on one disk, the same data is duplicated on the other disks in the RAID array. You can implement RAID to add fault tolerance in Windows Server 2003. Fault tolerance ensures the availability of other disks in a disk set if one of the disks fails.
This ReferencePoint introduces volume sets and RAID arrays in Windows Server 2003. It explains how to create and manage volume and volume sets in Windows Server 2003. In addition, it explains how to implement RAID on Windows Server 2003, and improve fault tolerance.
Working with Volume Sets
A volume set contains multiple volumes, and a volume represents the section of the disk that stores data directly in the disk. You can administer the volume sets by creating new volume sets and managing the existing volume sets.
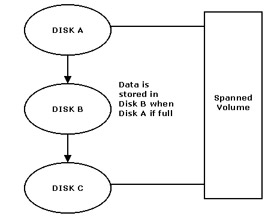
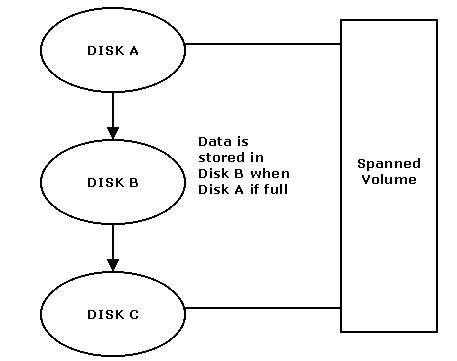
There are two types of volumes on the basis of the number of disks, Simple and Spanned. A Simple volume spans a single disk and you need free space in a single disk to create a Simple volume. A Spanned volume spans multiple disks, so you can combine the free space of up to 32 disks to form a single Spanned volume. In a Spanned volume, the data is first stored in one disk, and when that disk is full, the data is stored in another disk.
Figure 14-18-1 shows the structure of a Spanned volume:
When you store data in a spanned volume, the data is first stored in Disk A. When Disk A is full, the data is stored in Disk B.
| Note | When you create a volume set, you need to provide a volume label, which is a text descriptor for a drive. |
Introducing Volume Sets
A volume set is a collection of multiple volumes on dynamic disks. There are two types of volume sets, basic and dynamic. A basic disk is a physical disk with primary and extended partitions. A basic volume set is created using a basic disk. The dynamic disks allow you to create Simple and Spanned volumes, and are accessible to Windows 2000 server and Windows Server 2003. A dynamic volume set is created using a dynamic disk. A volume set enables you to:
-
Assign drive letters and paths to volumes.
-
Create volumes on a disk with free space.
-
Extend the capacity of an existing volume.
-
Create volumes that span two or more disks and configure fault tolerance.
-
Create a managed file system that stores the files effectively in a computer.
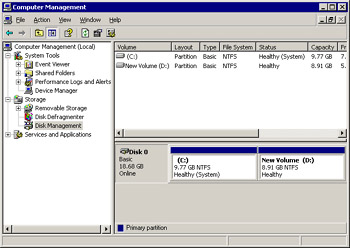
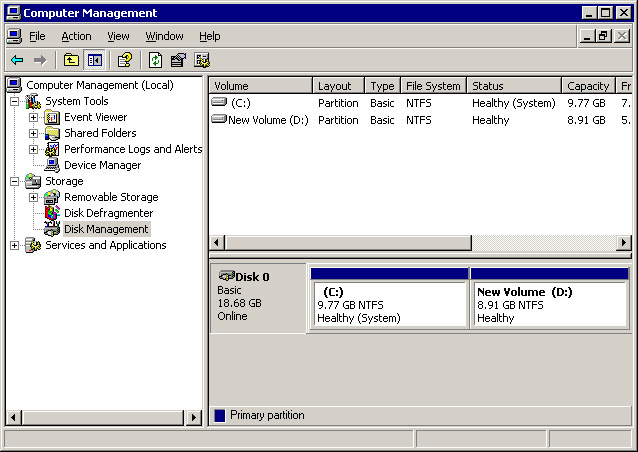
Figure 14-18-2 shows a list of simple volumes for Disk 0:
The disadvantage of using the volume sets is that if a disk partition fails, you cannot use the volume set, and all the data stored in the volume set is lost.
| Note | To learn more about the disks and disk partitions, read the Managing Drives and File System ReferencePoint. |
Creating and Deleting Volume Sets
You need to convert a basic disk to the dynamic disk before creating a volume set. To create a volume set on a dynamic disk:
-
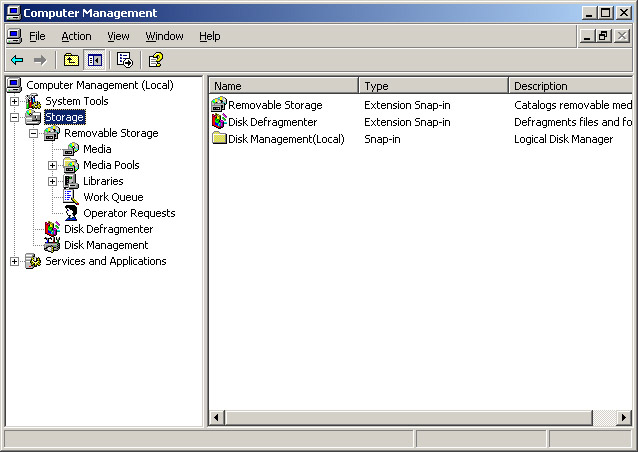
Select Start ->Administrative Tools ->Computer Management to open the Computer Management window, as shown in Figure 14-18-3:
-
Expand the Storage node in the left pane of the Computer Management window to display the contents of the Storage node.
-
Select the Disk Management node to display a list of disks and volumes in the right pane of the Computer Management window.
-
Right-click the unallocated area on the dynamic disk to display a shortcut menu.
-
Select the New Volume option from the shortcut menu to start the New Volume wizard. The Welcome screen of the wizard appears.
-
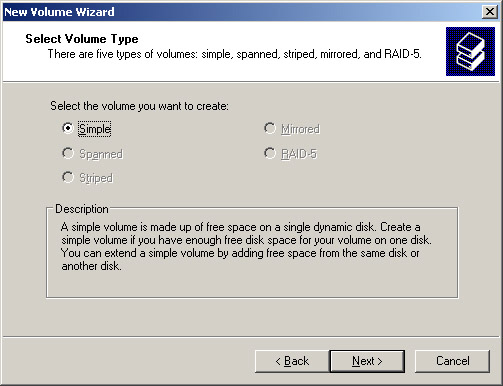
Click Next to open the Select Volume Type screen of the wizard.
-
Select the Simple option to create a simple volume on a single dynamic disk, as shown in Figure 14-18-4:
-
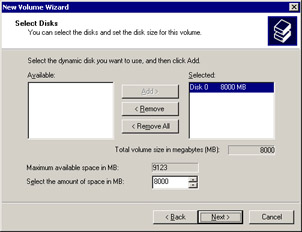
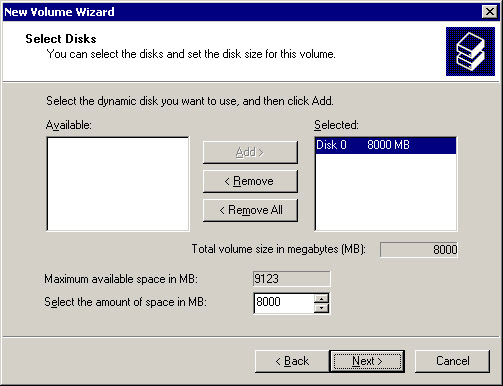
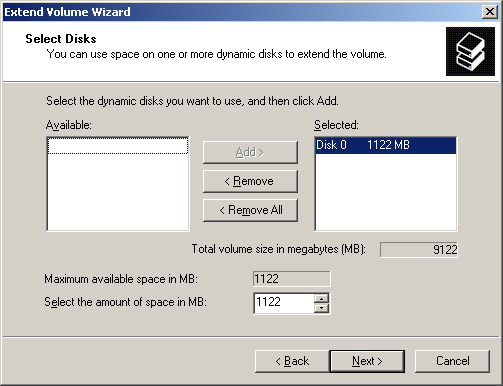
Click Next to open the Select Disks screen of the wizard, as shown in Figure 14-18-5:
-
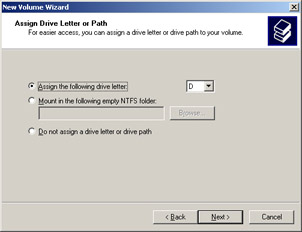
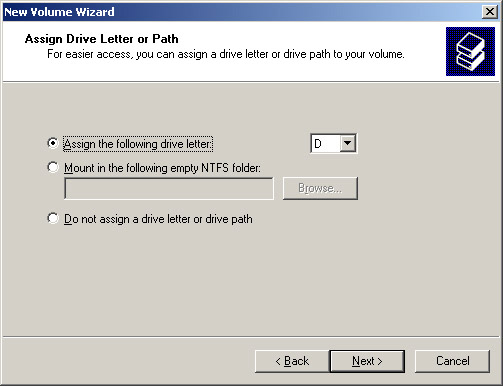
Click Next to open the Assign Drive Letter or Path screen of the New Volume wizard, as shown in Figure 14-18-6:
-
Select the required option to assign the drive letter. The options are:
-
Assign the following drive letter: Assigns the selected letter to the volume.
-
Mount in the following empty NTFS folder: Assigns a volume in an empty NT File System (NTFS) folder.
-
Do not Assign a drive letter or drive path: Does not assign a letter to a volume.
Note A mounted drive is a drive mapped to an empty folder on a volume that uses the NTFS file system.
-
-
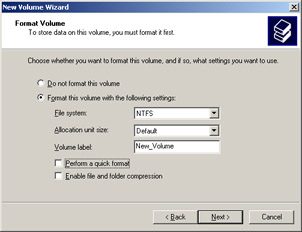
Click Next to open the Format Volume screen of the New Volume wizard, as shown in Figure 14-18-7:
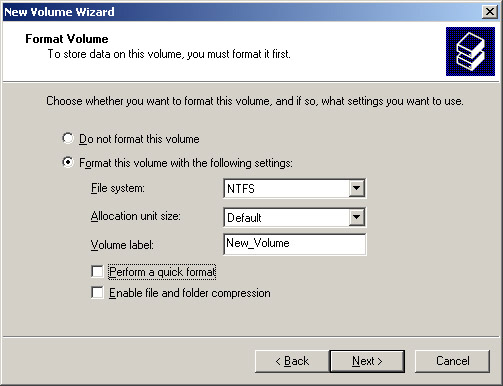
Figure 14-18-7: The Format Volume ScreenNote You need to select the NTFS option to format the volume with NTFS and select the Default allocation size.
-
Click Next to open the Completing the New Volume Wizard screen of the New volume wizard.
-
Select the Format this volume with the following settings option, if you need to store data in the volume.
-
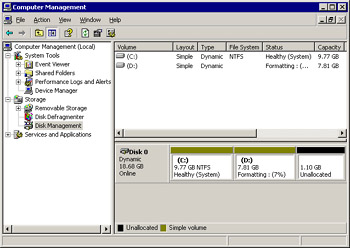
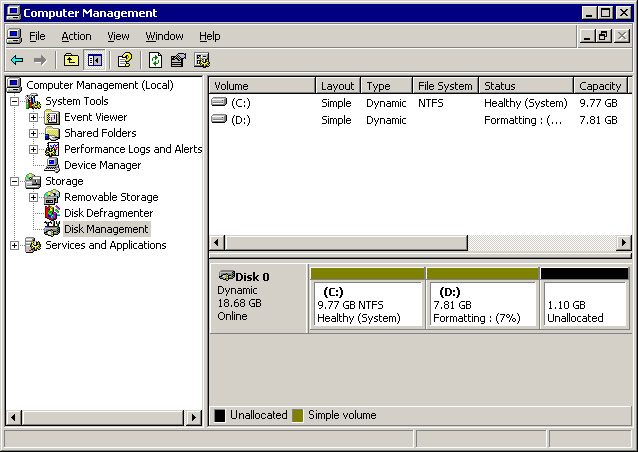
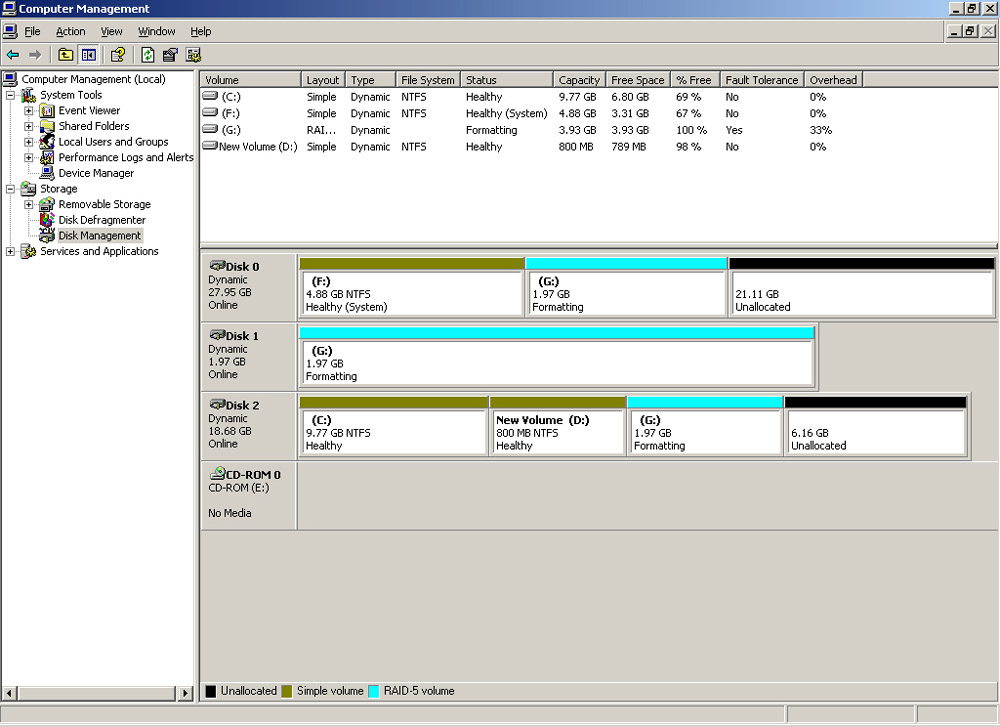
Click Finish to open the Computer Management window and start formatting the volume, as shown in Figure 14-18-8:
Managing Volume Sets
You can manage the volume sets to store data effectively in the disk. The operations that you can perform while managing the volume sets are:
-
Extending an existing volume set.
-
Changing the label of a volume set.
-
Converting a File Allocation Table (FAT) volume to the NTFS volume.
You can extend the existing volume sets to add more free space to the existing volume. You cannot extend a system volume that contains the system files. To extend an existing simple volume:
-
Open the Computer Management window.
-
Expand the Storage node in the left pane of the Computer Management window to display the content of the Storage node.
-
Select the Disk Management node to display a list of disks and volumes in the right pane of the Computer Management window.
-
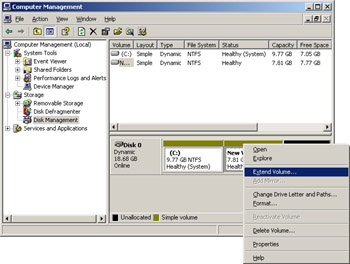
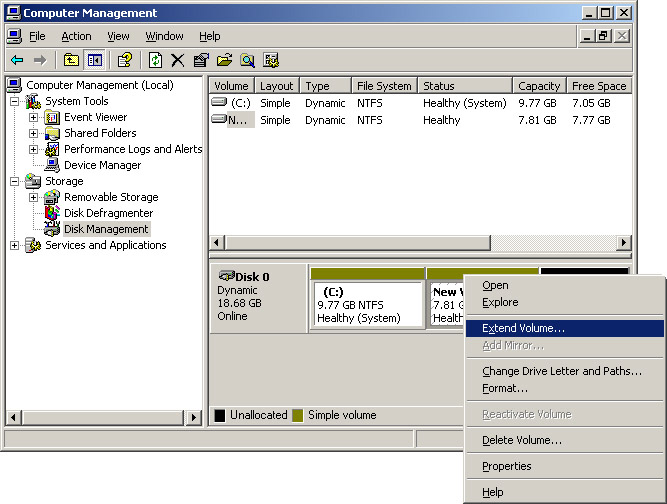
Right-click the volume, which you need to extend, to open a shortcut menu, as shown in Figure 14-18-9:
-
Select the Extend Volume option to open the Extend Volume wizard. The Welcome screen appears.
-
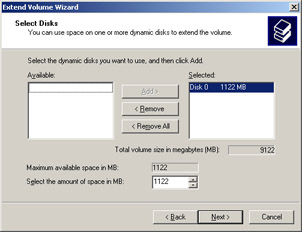
Click Next to open the Select Disks screen of the wizard, as shown in Figure 14-18-10:
-
Specify the amount of space that you need to add to an existing volume in the Select the amount of space in MB box.
-
Click Next to open the Completing the Extend Volume Wizard screen.
-
Click Finish to close the wizard.
The volume label is displayed when you access a disk. You can change or delete the label of an existing volume. To change or delete the label of a volume by using Disk Management node or Windows Explorer:
-
Open the Computer Management window.
-
Expand the Storage node in the left pane of the Computer Management window to display the content of the Storage node.
-
Select the Disk Management node to display a list of disks and volumes in the right pane of the Computer Management window.
-
Right-click the disk partition displayed in the Computer Management window to open a shortcut menu.
-
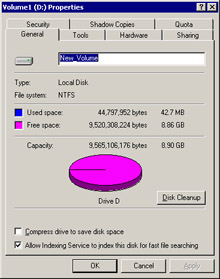
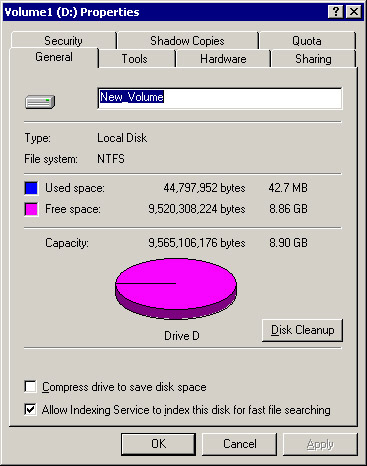
Select the Properties option from the shortcut menu to open the Properties dialog box, as shown in Figure 14-18-11:
-
Select the General tab of the Properties dialog box and specify the name of the volume in the text box.
-
Click Apply to apply the changes made in the preceding steps.
-
Click OK to close the Properties dialog box.
You can also convert a FAT volume to an NTFS volume using the Convert utility. This utility is located in the %SystemRoot% directory of Windows Server 2003. When you convert a volume to NTFS using the Convert utility, the data, and the file and directory structure are not changed.
Convert is a command line utility of Windows Server 2003. The syntax of the Convert utility is:
convert drive_name /FS:NTFS
For example, enter the following code to convert the C drive to the NTFS volume:
convert C /FS:NTFS
The Convert utility in Windows Server 2003 needs free disk space to convert the FAT volume to the NTFS volume, which should be 25 percent of the total disk space.
You cannot convert the NTFS volumes to the FAT volumes by using the Convert utility. If you need to convert an NTFS volume to a FAT volume, you need to delete all the existing partitions and create new partitions again as FAT volume.
| Note | FAT is an allocation table of an operating system that stores the information about a file, its size, location, and the number of sectors that store a file. NTFS, on the other hand, does not use the allocation tables, and stores information of a file in a file format. |
Introducing RAID Arrays
RAID array is a collection of multiple disks arranged in a single logical array. The RAID controller stores redundant data on the multiple disks and provides fault tolerance. When you store the redundant data on multiple disks, the operating system manages the storage and retrieval of data efficiently.
You can store and retrieve data from a RAID by using the techniques, such as disk mirroring and duplexing. Multiple disks involved in RAID increase the Mean Time Between Failure (MTBF), which increases the fault tolerance of an operating system if you store redundant data. You can also recover the data after disk crashes using a RAID.
| Note | MTBF is the average time a component can operate without a failure. |
Understanding the RAID Levels
RAID is implemented in the form of different levels in Windows Server 2003. You can implement these levels to perform different operations related to data storage and retrieval. Windows supports six levels of RAID implementations, which are:
-
RAID 0: Distributes the data among the existing disks on a computer. As a result, when a disk fails, the part of data stored in that disk is lost. The implementation of RAID 0 is called disk striping. To implement disk striping, you need to configure two or more volumes, each on a separate disk, as a striped set. You can divide the data, which you write to the striped set, into small blocks called stripes. When you implement disk striping, you can access the data on multiple disks, which improves the processing speed of the operating system. The disadvantage of implementing disk striping is that if any disk in the striped set fails, you cannot use the striped set and all the data is lost.
-
RAID 1: Writes the same set of data in multiple disks, which makes the data redundant. When one disk fails, you can retrieve the data from another disk, on which the redundant data is stored. The two types of RAID 1 volumes are mirrored and duplexed. A mirrored volume uses a single disk controller, but a duplexed volume uses two disk controllers. The implementation of RAID 1 is also called disk mirroring. To implement disk mirroring, you need to create a redundant set of data using different volumes of the same size on different disks. The disadvantage of implementing disk mirroring is that you need free disk space equivalent to the disk space you need to store the data.
-
RAID 2: Divides the data bit-wise across multiple disks. You can implement this level of RAID on the disks that do not have a built-in error detection mechanism.
-
RAID 3: Divides the data byte-wise across multiple disks and the parity is stored on a separate disk. If a disk fails, the data can be recovered from the parity disk.
-
RAID 4: Divides the data into blocks and stores it in multiple disks. You can access and retrieve the lost data easily in the RAID 4 volumes, because the data is stored as large blocks. In RAID 4 volumes, parity is stored on a separate hard disk.
-
RAID 5: Divides the data into blocks. The implementation of a RAID 5 volume is similar to a RAID 4 volume, but the parity in RAID 5 is not stored on a separate disk. The parity, along with the data, is distributed to the disks on a computer. You can distribute the data in RAID 5 implementation in a manner similar to RAID 1. The implementation of RAID 5 is also called disk striping with parity. To implement disk striping with parity, you need at least three hard disks to set up fault tolerance. Disk striping with parity:
-
Is the enhanced version of disk striping, with an additional feature of fault tolerance.
-
Writes the parity checksums with the block of data to add fault tolerance. The parity information recovers the data if a disk in the striped set fails.
-
You can create a RAID volume using the dynamic disks available on your computer. You can create three RAID volumes in Windows Server 2003 to improve the performance, redundancy, and fault tolerance of the operating system.
| Note | To learn more about RAID, see the Managing Drives and File Systems ReferencePoint. |
Creating RAID Volumes
Windows Server 2003 supports three different levels of RAID volumes, RAID 0, RAID 1, and RAID 5. The RAID 0 volume improves the performance of the operating system. You need at least 2 dynamic disks for a RAID 0 volume. To create a RAID 0 volume:
-
Open the Computer Management window.
-
Expand the Storage node in the left pane of the Computer Management window.
-
Select the Disk Management node to display a list of disks and volumes in the right pane of the Computer Management window.
-
Right-click unallocated area and select the New Volume option from the shortcut menu to start the New Volume wizard.
-
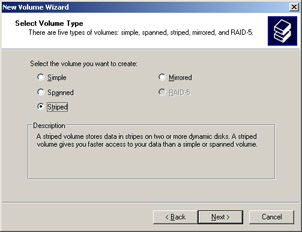
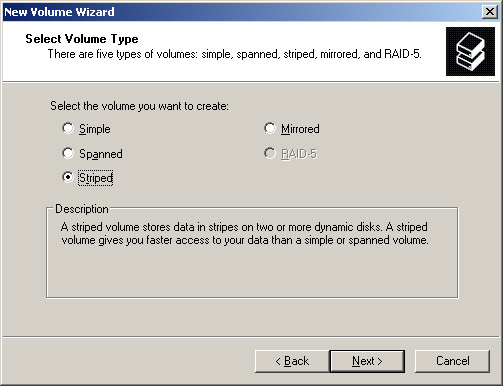
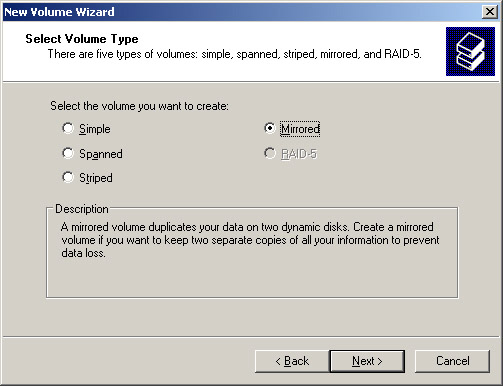
Click Next to open the Select Volume Type screen of the New Volume wizard, as shown in Figure 14-18-12:
-
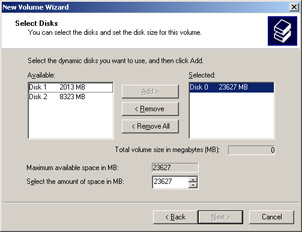
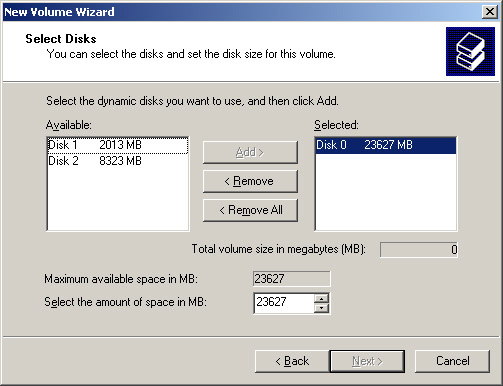
Click Next to open the Select Disks screen of the New Volume wizard, as shown in Figure 14-18-13:
-
Select a dynamic disk from the Available pane of the Select Disks screen.
-
Click Add to move the selected dynamic disk to the Selected pane of the Select Disks screen.
-
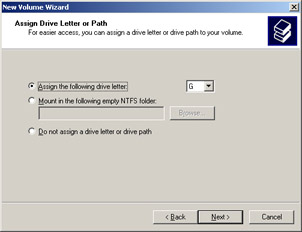
Click Next to open the Assign Drive Letter or Path screen, as shown in Figure 14-18-14:
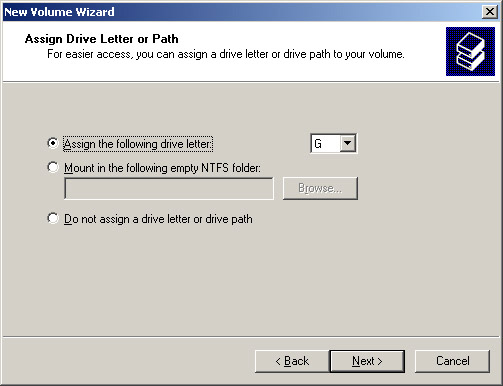
Figure 14-18-14: The Assign Drive Letter or Path Screen-RAID 0 -
Click Next to move to the Format Volume screen of the New Volume wizard. You need to select the Format the volume with following settings option and specify the settings, as specified while creating a simple volume.
-
Click Next to create a new RAID 0 volume and start the formatting of RAID 0 volume.
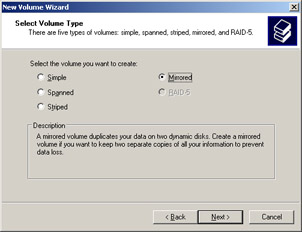
RAID 1 volume improves the redundancy of data in the operating system. You need to have at least two dynamic disks to create a RAID 1 volume. To create a RAID 1 volume:
-
Start the New Volume wizard.
-
Click Next to open the Select Volume Type screen of the New Volume wizard, as shown in Figure 14-18-15:
-
Select Mirrored and click Next to create a new RAID 1 volume, and start the formatting of the RAID 1 volume.
-
After the formatting is complete, a new RAID 1 volume is created.
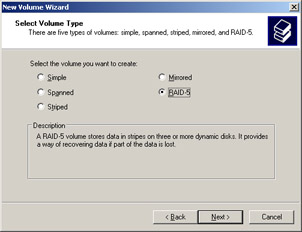
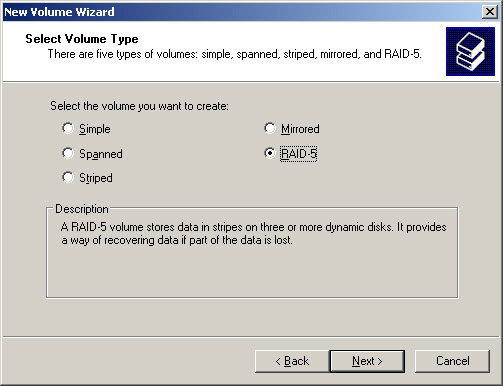
A RAID 5 volume improves the fault tolerance of the operating system. You need to have at least three dynamic disks for a RAID 5 volume. To create a RAID 5 volume:
-
Start the New Volume wizard.
-
Click Next to open the Select Volume Type screen of the New Volume wizard, as shown in Figure 14-18-16:
-
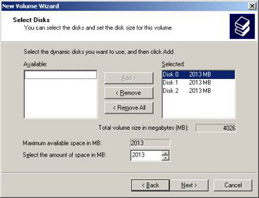
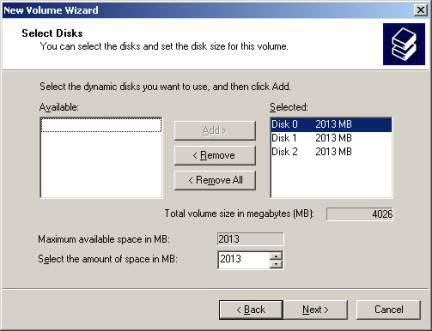
Click Next to open the Select Disks screen of the New Volume wizards, as shown in Figure 14-18-17:
-
Click Next to create a RAID 5 volume and format it, as shown in Figure 14-18-18:
-
After the formatting is complete, a new RAID 5 volume is created.
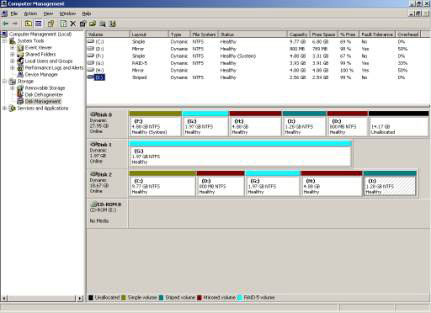
Figure 14-18-19 shows the different RAID volumes created on the dynamic disks:
Managing RAID
You need to manage the RAID levels, which Windows Server 2003 supports, to recover from disk failures. To recover from disk failures, you can break, repair, or remove a mirrored set, and repair a striped set or a striped set with parity.
Breaking a Mirrored Set
You need to break a mirrored set to continue the disk operation if a disk in the mirrored set fails. Breaking a mirrored set means separating the volumes from each other form the mirrored set. You can also break a mirrored set when you do not want the mirrored disk sets. To break a mirrored set:
-
Open the Computer Management window.
-
Expand the Storage node in the left pane of the Computer Management window.
-
Select the Disk Management node to display a list of disks and volumes in the right pane of the Computer Management window.
-
Right-click a volume and select the Break Mirrored Volume option from the shortcut menu. A warning message box appears.
-
Click Yes to break the mirrored volume and create two independent volumes.
Repairing a Volume in a Mirrored Set
Failure of a mirrored system volume prevents the booting of a computer. To enable the booting of the computer, you need to repair the mirrored set by adding the following syntax to the boot.ini boot file of the computer:
multi(0)disk(0)rdisk(2)partition(2)\WINNT="Boot Mirror D: - secondary plex"
When a computer fails to boot to the primary system volume, you need to restart the computer and select the Boot Mirror-Secondary Plex option to boot the computer to the secondary drive.
Removing a Volume from a Mirrored Set
You can also remove a volume from a mirrored set. When you remove a volume, the data of the removed volume is deleted and the space is marked as Unallocated. To remove a volume from a mirrored set:
-
Open the Computer Management window.
-
Expand the Storage node in the left pane of the Computer Management window.
-
Select the Disk Management node to display a list of disks and volumes in the right pane of the Computer Management window.
-
Right-click a volume in the mirrored set in the right pane of the Computer Management window, and select the Remove Mirror option from the shortcut menu. The Remove Mirror dialog box appears.
-
Select the disk, from which the volume is to be deleted, to remove the mirrored volume.
Repairing a Striped Set
If a disk in a striped set fails, you cannot use the entire striped set, because there is no fault tolerance in a striped set. You need to repair or replace the failed disk to restore the striped set. Then you need to create the striped set again and recover the data stored on the striped set from the backup.
If a mirrored volume other than the system volume fails, you need to break the mirrored set to separate the volumes of the mirrored set. After breaking the mirrored set, you need to create a new mirrored volume set not including the failed volume.
Repairing a Striped Set with Parity
Implementing the RAID 5 level, or the striped set with parity, helps you recover the striped set if a single disk of the striped set fails. You need to repair a RAID, if the status of a disk is not Healthy.
| Note | To learn more about status of disks, see the Managing Drives and File Systems ReferencePoint. |
To repair RAID 5 on the basic and dynamic disk, if the status of the disk is Offline or Missing:
-
Open the Computer Management window.
-
Expand the Storage node in the left pane of the Computer Management window.
-
Select the Disk Management node to display a list of disks and volumes in the right pane of the Computer Management window.
-
Right-click the icon of the failed volume in the Computer Management window and select the Reactivate Disk option from the shortcut menu to change the status of the disk to Regenerating -> Healthy.
To repair a RAID 5 volume if the status of the disk is Unreadable:
-
Open the Computer Management window.
-
Expand the Storage node in the left pane of the Computer Management window.
-
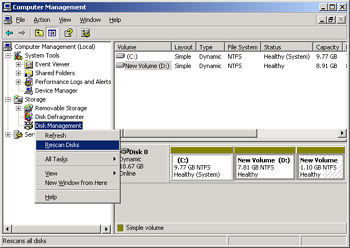
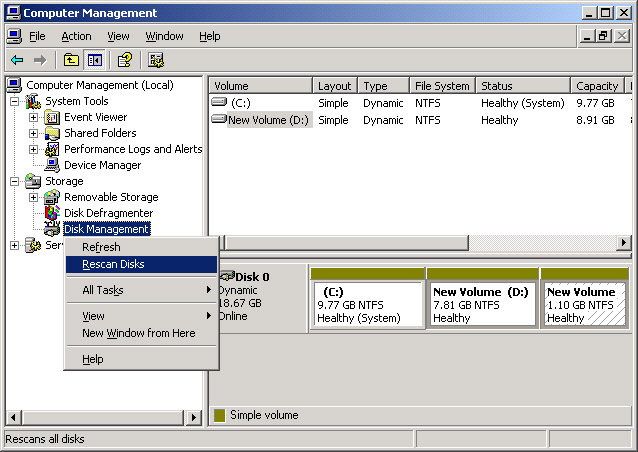
Right-click the Disk Management node, as shown in Figure 14-18-20:
-
Select the Rescan Disks option from the shortcut menu to change the status of the disk to Regenerating -> Healthy.
Creating a Fault-Tolerant Environment
You can create a fault tolerant environment by implementing fault tolerance at the software and hardware level. When you implement fault tolerance at the software level, Windows Server 2003 provides an interface, which helps a programmer to insert checkpoints at a point where the data is important to be stored. The program takes a backup of data at these checkpoints. When you implement fault tolerance at the hardware level, a hardware component is duplexed, and the disks are mirrored. Windows Server 2003 supports fault tolerance only on the dynamic disks. The disks that create the fault tolerant volume by using a RAID, increase the performance or reliability of Windows Server 2003.
Improving Fault-Tolerance Using RAID
You can improve the performance and fault tolerance of the operating system using the different levels of RAID.
Table 14-18-1 lists the levels of RAID that Windows Server 2003 supports, along with their comparison:
| RAID Level | RAID Type | Minimum Disks Required | Effective Capacity | Major Advantage |
|---|---|---|---|---|
| RAID 0 | Disk striping | 2 | S * N, where S= Size of smallest disk of the array N= Number of disks in the array | Improves the speed and performance. |
| RAID 1 | Disk mirroring | 2 | S | Improves redundancy and can be used to store data. |
| RAID 5 | Disk striping with parity | 3 | S * (N – 1) | Improves fault tolerance and can be used to retrieve data. |
You can select the level of RAID on the basis of the type of data to be stored. RAID 0 improves the read and write performance of the operating system but does not affect fault tolerance.
RAID 1 helps you mirror two or more disks, which consumes more time for data storage and increases the time for data retrieval. When a disk in the mirror fails, you can retrieve the data from another disk in the mirror.
RAID 5 improves the fault tolerance as compared to RAID 1. If a disk fails, you can combine the blocks of data on the other disks with the parity to recover the lost data.
Improving Fault Tolerance Using Volume Shadow Copy Service
In Windows Server 2003, Volume Shadow Copy Service (VSS) provides file system-based fault tolerance. The VSS technology is different from normal backup and restore. VSS performs a point-in-time backup of an entire NTFS volume to a local or remote disk. VSS can also be scheduled to backup a volume at regular intervals.
You cannot directly restore the files stored in the shadow copies, but can access the files when you connect to the volume that contains the shadow copy.
| Note | To learn more about shadow copies, see the Data Sharing and Auditing ReferencePoint. |
To backup and recover data from a shadow copy using VSS:
-
Select Start ->Run to open the Run dialog box.
-
Enter \\servername\sharename in the Open text box in the Run dialog box. The servername parameter represents the name of the server and the sharename parameter represents the name of the folder created in the volume that contains the shadow copy.
-
Click OK. The sharename folder opens.
-
Select the Schedule tasks node in the left pane of the explorer window of the sharename folder to display a list of shadow copies.
-
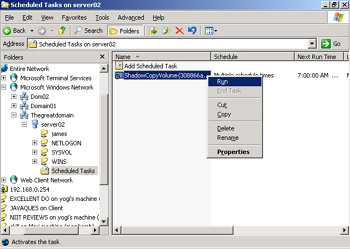
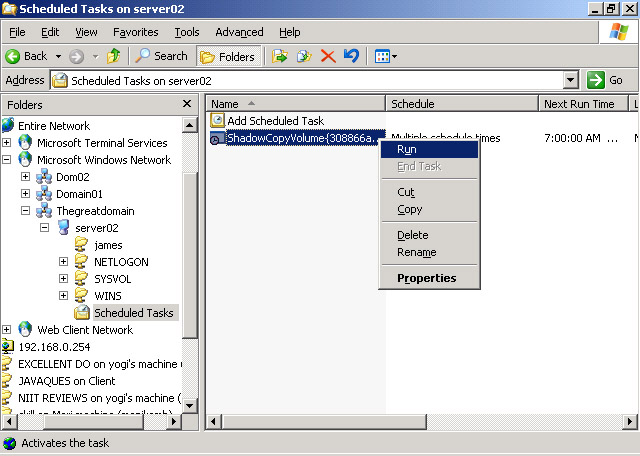
Right-click the ShadowCopyVolume icon in the right pane of the explorer window of the sharename folder to open a shortcut menu, as shown in Figure 14-18-21:
-
Select the Run option to backup the data using shadow copy.
-
Close the sharename folder.
-
Open the sharename folder when you need to restore the data from the shadow copy.
-
Right-click the icon of the shadow copy, from where you need to restore the data, and select the View option from the shortcut menu to open Windows Explorer displaying the files of the shadow copy.
-
Right-click the file you need to restore and select the Copy option from the shortcut menu to copy the selected file.
-
Navigate to the original location of the file and paste the file.
-
Close Windows Explorer.
Improving Fault Tolerance Using Microsoft Cluster Service
Microsoft Cluster Service (MSCS) provides system fault tolerance in Windows Server 2003 Enterprise edition through various processes, such as failover and failback. In failover, when a system fails, the cluster services are made available offline, and are moved from the failed server to another server where they are again made online to function. In failback, when the failed system resumes, the cluster services are moved back to the original server.
MSCS provides fault tolerance to various resources, such as file shares, database services, and back-end applications. You need to select a cluster configuration model to deploy MSCS, depending on the type of fault tolerance. There are three cluster configuration models in Windows Server 2003:
-
Single-quorum device cluster: Connects each node in a cluster to a shared storage device that contains the configuration of a cluster. The cluster configuration defined in this model provides fault tolerance to the applications and services that access critical data.
-
Single-node cluster: Helps develop applications to test the cluster applications. In the single-node cluster model, there is only one node in a cluster, which can use the shared storage. You need a single server with the local resources in a single-node cluster model. There is no failover in the single-node cluster because it contains only one node.
-
Majority node set cluster (MNS): Maintains a local copy of the quorum device data. The clusters in this model can use the shared storage devices, but the clustersdo not depend on the storage devices.
When a cluster in the MNS cluster model needs to implement the failover across two servers, the two serves should be connected to each other using a Virtual Private Network (VPN). More than half of the total nodes in a cluster should be operational for an MNS cluster to be operational. When a node in the MNS cluster fails, you can use the failover and failback process to recover the data. To implement failover and failback using MSCS:
-
Select Start -> Administrative Tools -> Cluster Administrator to open the Cluster Administrator window.
-
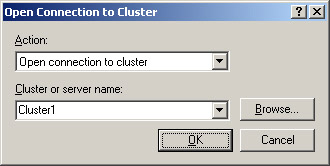
Select File -> Open Connection to Cluster. The Open Connection to Cluster dialog box appears, as shown in Figure 14-18-22:
-
Select the cluster name from the Cluster Name text field and Click OK to connect to the cluster.
-
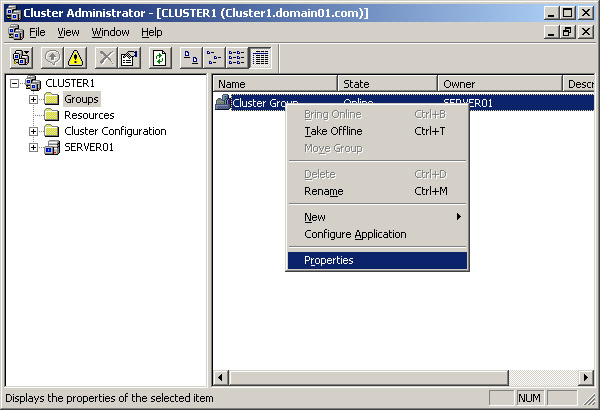
Select the name of the cluster in the left pane of the Cluster Administrator window to display the Cluster Group icon in the right pane of the Cluster Administrator window.
-
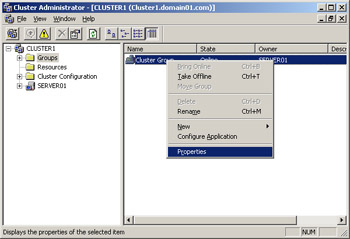
Right-click Cluster Group and select the Properties option from the shortcut menu, as shown in Figure 14-18-23, to open the Properties dialog box:
-
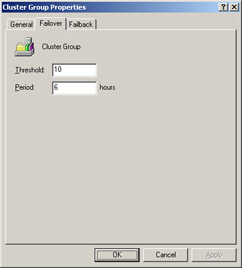
Click the Failover tab to display the Failover tab page of the Properties dialog box, as shown in Figure 14-18-24:
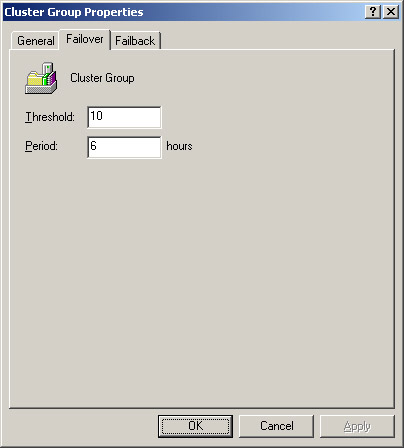
Figure 14-18-24: The Failover Tab of Cluster Group Properties Dialog Box
-
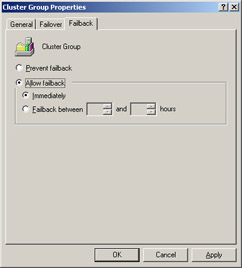
Click the Failback tab to display the Failback tab page of the properties dialog box, as shown in Figure 14-18-25:
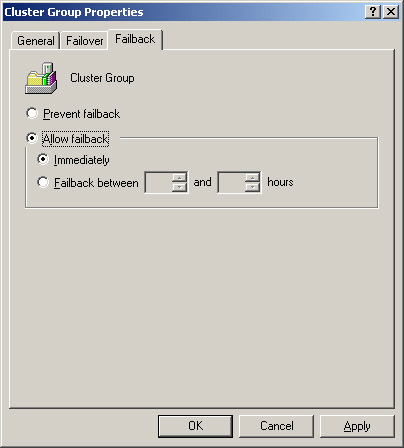
Figure 14-18-25: The Failback Tab of the Cluster Group Properties Dialog Box -
Click Apply and OK to complete the failover and failback configuration.
-
Select File -> Close to close the Cluster Administrator window.
You can also improve the fault tolerance in Windows Server 2003 using Volume Shadow Copies, Network Load Balancing, and Remote Storage.

