Windows Server 2003 is a server operating system that provides an environment for creating Web services Windows Server 2003 provides various services, such as hosting e-commerce Web sites and managing business applications You can install Windows Server 2003 using the Windows Server 2003 Compact Disk (CD), which contains the files required for the installation. You can also upgrade an existing operating system to Windows Server 2003 using the Windows Server 2003 CD.
This ReferencePoint explains the prerequisites to install Windows Server 2003. It explains how to install Windows Server 2003 on a local computer or over a network and how to perform unattended installation and troubleshoot Windows Server 2003. It also describes how to upgrade Windows 2000 Server to Windows Server 2003.
Prerequisites to Install Windows Server 2003
Before installing Windows Server 2003, you need to ensure that the configuration of the computer meets all the prerequisites for installing the operating system. You must identify the edition of the operating system that you need to install, the disk partition on which you want to install, and the licensing mode. You must also verify the hardware requirements.
In addition, when you upgrade an existing operating system to Windows Server 2003, you need to ensure that the existing operating system meets the prerequisites for installing Windows Server 2003.
Identifying Editions of Windows Server 2003
You need to specify the edition of the operating system at the time of installing Windows Server 2003. The four editions of Windows Server 2003 are: Standard, Enterprise, Datacenter, and Web.
Table 14-1-1 lists the features supported by the different versions of Windows Server 2003:
| Features | Standard | Enterprise | Datacenter | Web |
|---|---|---|---|---|
| 64-bit version operating system | No | Yes | Yes | No |
| Cluster support | No | 8 computers | 8 computers | No |
| Scope | Small-medium size organizations | Medium-large size organizations | High end enterprise networks | Web server |
| Applications | Print, file, and dial-in applications | Networking, inventory, messaging, databases, and e-commerce | Real time and database applications | Web services |
| Note | A cluster is a group of servers that work together as a single entity. If one server in a cluster fails, other servers are accessible to the clients. |
Verifying Hardware Requirements for Windows Server 2003
The hardware requirements consist of various parameters, such as bit version of operating system, speed of the CPU, size of the RAM, hard disk space, and number of processors. The 32-bit version of the operating system runs on Intel 32-bit Pentium processors, whereas the 64-bit version of the operating system runs on Intel Itanium processors. The 64-bit version operating system processes information faster compared with the 32-bit version operating system because 64-bit version supports high CPU clock speed. As a result, scientific analysis applications use the 64-bit version of Windows Server 2003.
Table 14-1-2 lists the hardware requirements for installing different editions of Windows Server 2003.
| Parameters | Standard Edition | Enterprise Edition | Datacenter Edition | Web Edition |
|---|---|---|---|---|
| CPU speed (Minimum) | 133 MHz | 133 MHz (x86) | 400 MHz (x86) | 133 MHz |
| CPU speed (Recommended) | 550 MHz | 733 MHz | 733 MHz | 550 MHz |
| RAM size (Minimum) | 128 MB | 128 MB | 512 MB | 128 MB |
| RAM size (Recommended) | 256 MB | 256 MB | 1GB | 256 MB |
| RAM size (Maximum) | 4GB | 32 GB (x86) 64 GB (Itanium) | 64 GB (x86) 512 GB (Itanium) | 2 GB |
| Hard Disk (Minimum) | 1.5 GB | 1.5 GB (x86) 2.0 GB (Itanium) | 1.5 GB (x86) 2.0 GB (Itanium) | 1.5 GB |
| Number of processors (Minimum) | 1 | 1 | 8 | 1 |
| Number of processor (Maximum) | 4 | 8 | 64 | 2 |
Identifying Disk Partitions
To install Windows Server 2003, you need to partition the disk to store the installation files. You can create a disk partition using one of the following options:
-
Creating a partition on a partitioned hard disk.
-
Creating a partition on a non-partitioned hard disk.
-
Using an existing partition.
-
Creating a partition after deleting an existing partition.
When you create a disk partition, you need to specify a file system in which the disk partition is formatted. Windows Server 2003 supports various file systems, such as File Allocation Table (FAT), FAT32, and New Technology File System (NTFS).
| Note | NTFS provides better security than the FAT and FAT32 file partitions. |
Identifying Licensing Modes and other Applications
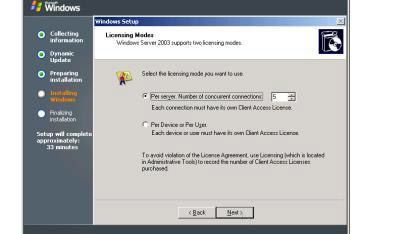
During installation, you need to specify the licensing modes of an operating system to access the server. Windows Server 2003 supports two types of licensing modes, Per seat and Per server.
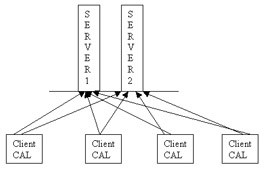
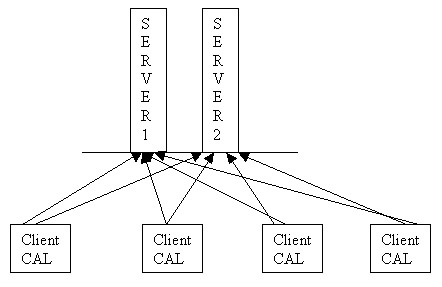
In the per seat licensing mode, each client computer contains a license that enables the client to access multiple servers in a domain. Each client contains a Client Access License (CAL), which enables the client to access various servers, such as the file and print servers. Large organizations use the per seat licensing mode to support large number of servers and clients. Figure 14-1-1 shows the per seat licensing mode:
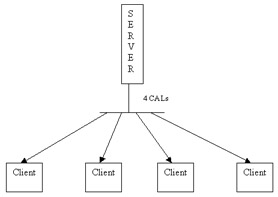
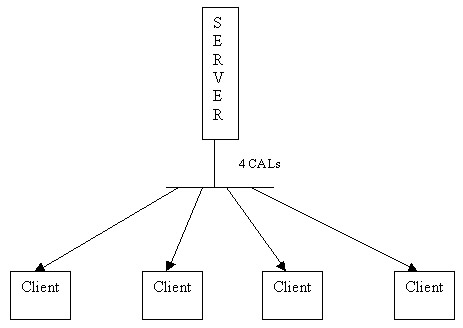
In the per server licensing mode, each server contains a license that provides access to a specified number of clients. Small organizations use this mode to support fixed number of clients. Suppose, for example, a company has two servers and 20 clients, and all the clients need to access both the servers. In this case, the servers need to support the per server license mode to connect 20 clients to the two servers simultaneously.
Figure 14-1-2 shows the per server licensing mode:
| Note | CAL is not required to access Web, File Transfer Protocol (FTP), and Telnet services. |
The per server licensing mode is cheaper than the per seat licensing mode because you do not need to purchase individual license for each client.
After you identify the licensing modes, you can specify optional applications and services that you want to install at the time of installing Windows Server 2003. Various optional applications and services in Windows Server 2003 are:
-
Accessories: Contains various Windows applications, such as Paint, WordPad, and games.
-
Internet Information Services (IIS): Contains a suite of Web-based applications to create and administer Web sites.
-
Cluster services: Provide services to the clients, even if one of the clusters or servers is unavailable.
-
Message queuing: Ensures secure message delivery over the network.
-
Network services: Contain a suite of network services, such as Domain Name Service (DNS), Dynamic Host Configuration Protocol (DHCP), and Windows Internet Naming Service (WINS), to access computer resources over the network.
-
Network file and print services: Store file and print services on a network, which can be accessed by computers running on various operating systems, such as UNIX and Macintosh.
Installing Windows Server 2003
You can install Windows Server 2003 after you verify that your computer meets the minimum hardware requirements. You can install Windows Server 2003 on a local computer or over the network. You can also use the unattended installation of Windows Server 2003 to eliminate any interaction during the installation. After installing Windows Server 2003, you need to configure the server to enable end users to work with the operating system.
Installing Windows Server 2003 on a Local Computer
You can perform a fresh installation of Windows Server 2003 if no other operating system is installed on your computer. You can also upgrade an operating system, such as Windows NT or Windows 2000 Server, to Windows Server 2003. You use two modes, text and Windows, to perform fresh installation of Windows Server 2003. You use the text mode to install Windows Server 2003. After Windows Server 2003 is installed, you configure the system settings using the Windows mode. To install Windows Server 2003 Standard or Enterprise edition in the text mode:
-
Insert the Windows Server 2003 CD in the CD-ROM drive. The message, Press any key to boot from CD, is displayed.
-
Press any key to start the installation process. The Windows 2003 setup checks the minimum hardware configurations and displays the Windows Setup screen.
-
Press the Enter key. The Setup Notification screen appears that provides options to continue or quit the Windows Server 2003 setup process.
-
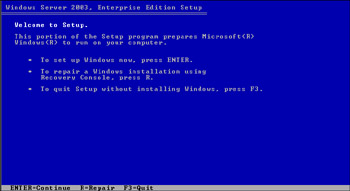
Press the Enter key to display the Welcome to Setup screen, as shown in Figure 14-1-3:
-
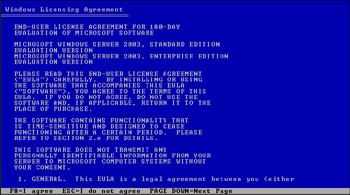
Press the Enter key to display the Windows Licensing Agreement screen, as shown in Figure 14-1-4:
-
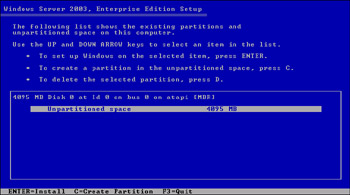
Press the F8 key to accept the license agreement. The Create Partition screen appears, as shown in Figure 14-1-5:
-
Press the C key to create a new partition for installing Windows Server 2003.
-
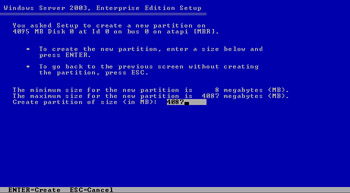
Enter 4087 in the Create partition of size (in MB) text box of the Create a New Partition screen to specify the size of the disk partition, as shown in Figure 14-1-6:
-
Press the Enter key to display the Create Partition screen again, as shown in Figure 14-1-7:
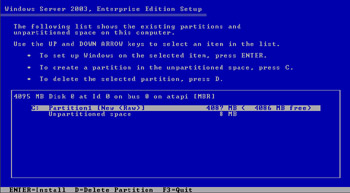
Figure 14-1-7: The Create Partition Screen Showing the Created Partition -
Press the Enter key to continue with the installation process. Verify that the option, Format the partition using the NTFS file system, is selected.
-
Press the Enter key to format the partition using the NTFS file system.
After formatting the partition, setup checks the hard disk space and copies the installation files on the hard disk. Then, the setup reboots the computer.
| Caution | You should not press any key when the message, Press any key to boot from CD, reappears at the time of rebooting the computer. The Windows Server 2003 setup restarts if you press any key. |
After the computer reboots, Windows setup loads the Windows mode of the Windows Server 2003 installation to configure the system settings of the operating system. To configure the system settings:
-
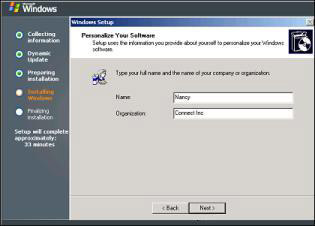
Click Next on the Regional and Language Option page of the Windows Setup window, which is the first window that appears after the computer reboots. The Personalize Your Software page appears.
-
Enter your name and the name of your organization in the Name and Organization text boxes, as shown in Figure 14-1-8:
-
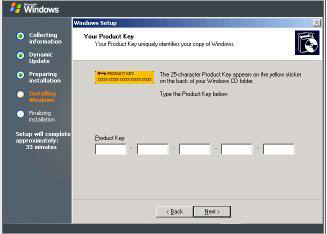
Click Next to display the Your Product Key page. Enter the product key, which is specified on the back of the Windows Server 2003 CD, in the Product Key text box, as shown in Figure 14-1-9:
-
Click Next to display the Licensing Modes page, as shown in Figure 14-1-10:
-
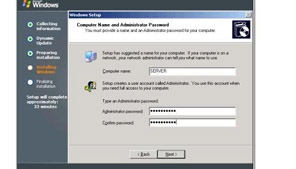
Click Next to display the Computer Name and Administrator Password page. Enter the computer name and administrator password in the Computer name and Administrator password text boxes, and reenter the administrator password in the Confirm password text box to confirm the password, as shown in Figure 14-1-11:
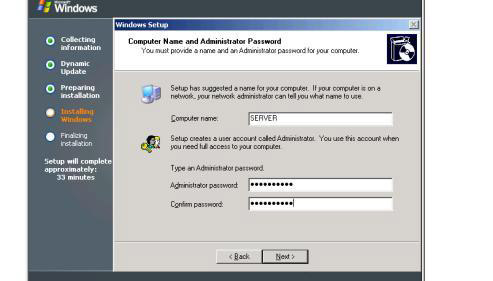
Figure 14-1-11: The Computer Name and Administrator Password Page -
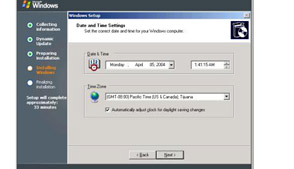
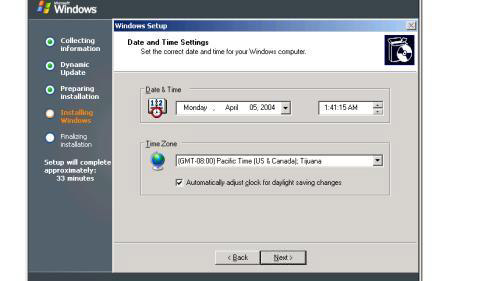
Click Next to display the Date and Time Settings page, as shown in Figure 14-1-12:
-
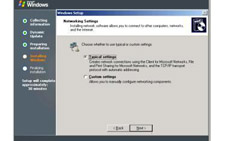
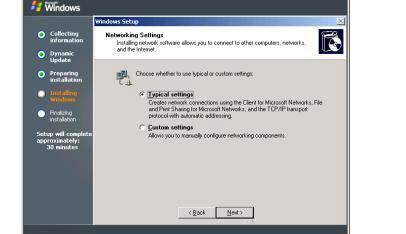
Click Next to display the Networking Settings page, as shown in Figure 14-1-13:
-
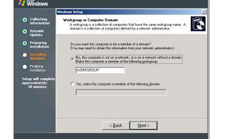
Click Next to display the Workgroup or Domain page, as shown in Figure 14-1-14:
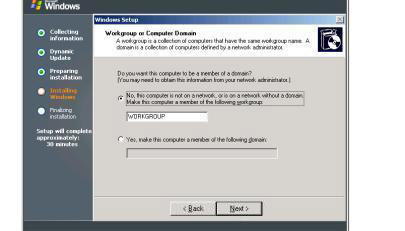
Figure 14-1-14: The Workgroup and Domain PageNote A workgroup is a group of computers that do not share a centralized security database whereas a domain shares a centralized security database. A security database stores information related to members of a domain or workgroup.
-
Click Next to copy the installation files on the disk partition.
The Windows Server 2003 setup automatically reboots the computer after you copy the installation files. After the computer restarts, press Ctrl, Alt, and Del keys simultaneously and enter the administrator password to start using Windows Server 2003.
Installing Windows Server 2003 Across a Network
You can install Windows Server 2003 across a network instead of installing on each computer when you need to install the operating system on more than one computer. You need to store the installation files of the operating system on a computer and enable their access over the network. The computer that stores the installation files of Windows Server 2003 is known as the distribution server. A computer that accesses the distribution server is known as a target computer.
You need to create a distribution server to install Windows Server 2003 over a network. To create a distribution server, you need to share the CD-ROM of the computer that contains Windows Server 2003 CD. You need to copy the /i386 folder from the CD to a shared folder on the distribution server, from where the target computers can access it.
To install Windows Server 2003 over a network:
-
Boot all the target computers in the network.
-
Connect each target computer with the distribution server.
-
Navigate to the shared folder of the distribution server in the target computer and run the Winnt32.exe file. The Winnt32.exe file performs various functions, which are:
-
Building four Windows Server 2003 boot disks on the drive A of each target computers.
-
Building the $win_nt$.~ls temporary folder on the target computer, which contains the setup and operating system files.
-
Copying all the installation files from the shared folder of the distribution server to the temporary folders of the target computers.
Note You need to run the Winnt.exe file from the shared folder if the target computer is Windows 3.x, such as Windows 3.1, and Windows 3.2. If the target computer is running on Windows 95, 98, NT 4, or Windows 2000, you need to run the Winnt32.exe file.
-
-
Disconnect the target computers from the distribution server.
-
Reboot the target computers with the first setup boot disk.
-
Install Windows Server 2003 by following the steps to install Windows Server 2003 on a local computer.
Configuring Windows Server 2003
You need to configure Windows Server 2003 after installing it. You need to configure TCP/IP settings in Windows Server 2003 for accessing other computers in a network. To configure Windows Server 2003:
-
Right-click the Start button, and select the Properties option from the shortcut menu. The Taskbar and Start Menu Properties dialog box appears, as shown in Figure 14-1-15:
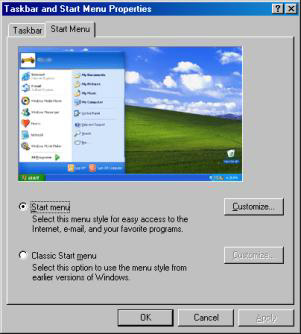
Figure 14-1-15: The Taskbar and Start Menu Properties Dialog Box -
Select the Classic Start menu option to use the menu style from earlier versions of Windows, and click the Apply button.
-
Click the OK button to close the Taskbar and Start Menu Properties dialog box.
-
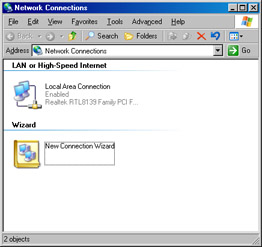
Right-click the My Network Places icon on the desktop, and select the Properties option from the shortcut menu to display the Network Connections window, as shown in Figure 14-1-16:
-
Right-click the Local Area Connection icon, and select the Properties option from the shortcut menu. The Local Area Connection Properties dialog box appears, as shown in Figure 14-1-17:
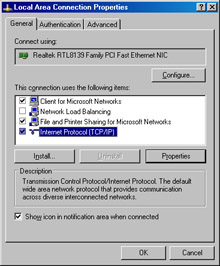
Figure 14-1-17: The Local Area Connection Properties Dialog Box -
Select the Internet Protocol (TCP/IP) option, and click the Properties button. The Internet Protocol (TCP/IP) Properties dialog box appears, as shown in Figure 14-1-18:
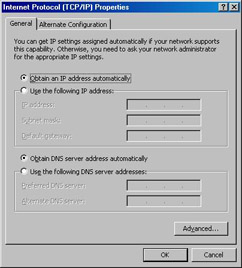
Figure 14-1-18: The Internet Protocol (TCP/IP) Properties Dialog Box -
Select the Use the following IP address option from the Internet Protocol (TCP/IP) Properties dialog box to apply the IP settings manually.
-
Enter the IP address of a computer according to your network configuration settings, such as 203.192.182.1, in the IP address text box, as shown in Figure 14-1-19:
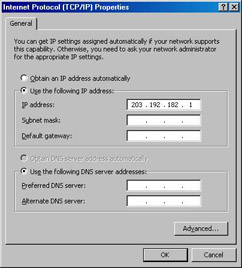
Figure 14-1-19: Displaying the IP Address of the ComputerThe 255.255.255.0 IP address automatically appears in the Subnet mask text box when the text box is enabled.
Note A subnet mask is a 32-bit number that identifies whether the IP address is on a local or remote network and distinguishes the network ID and host ID. A default gateway is a computer that helps to communicate between different networks using the TCP/IP connection.
-
Click the OK button to close the Internet Protocol (TCP/IP) Properties dialog box.
-
Close all the open dialog boxes by clicking the OK button.
Performing Unattended Installation of Windows Server 2003
You can install Windows Server 2003 on multiple computers using the unattended method of installation. You need to create an answer file, unattend.txt, to perform the unattended installation of Windows Server 2003. The answer file contains information, such as the IP address, computer name, DNS settings, and product key, which are needed to install an operating system. The answer file is also called unattended script. Unattended installation of Windows Server 2003 does not require end user interaction at the time of installation, and saves time of installing the operating system. An unattended installation is also called automated installation.
You can perform unattended installation on upgrades or on fresh installations. The Setup Manager wizard creates a new answer file or updates an existing answer file for the unattended installation of Windows Server 2003. In addition to creating the answer file, the Setup Manager wizard creates a distribution share folder that contains the installation files.
| Note | An executable file of the Setup Manager wizard of Windows Server 2003 is stored in the deploy.cab file under the \support\tools directory of the Windows Server 2003 CD. |
To create an answer file using the Setup Manager wizard:
-
Insert the Windows Server 2003 CD into the CD-ROM drive.
-
Open the deploy.cab file under the support\tools directory.
-
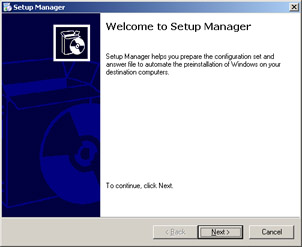
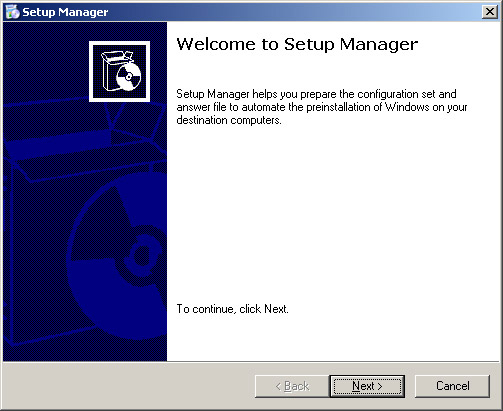
Run the setupmgr.exe file to start the Setup Manager wizard and display the Welcome to Setup Manager page, as shown in Figure 14-1-20:
-
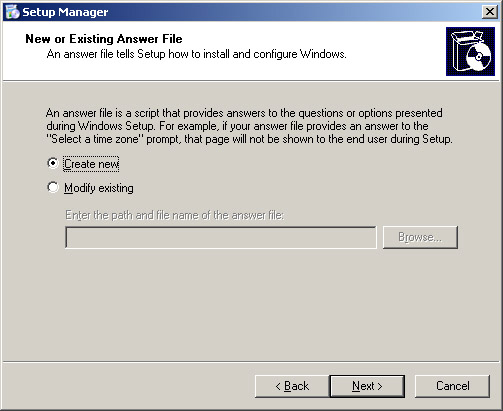
Click Next to display the New or Existing Answer File page, as shown in Figure 14-1-21:
-
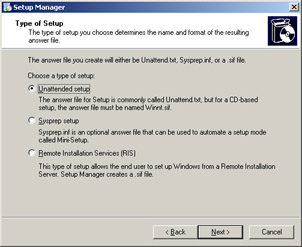
Select the Create New option and click Next to display the Type of Setup page, as shown in Figure 14-1-22:
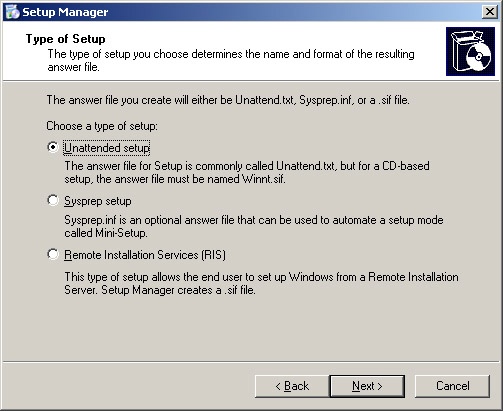
Figure 14-1-22: The Type of Setup Page-
Unattended setup: Creates the unattend.txt file for unattended installation of Windows Server 2003.
-
Sysprep setup: Creates the Sysprep.inf file to automate the unattended installation of Windows Server 2003. It is also called Mini-Setup.
-
Remote Installation Service (RIS): Creates a .sif file that allows the end user to install Windows from a Remote Installation Server.
-
-
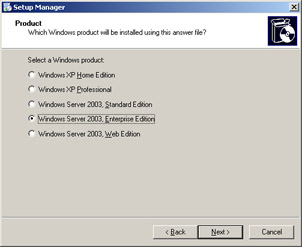
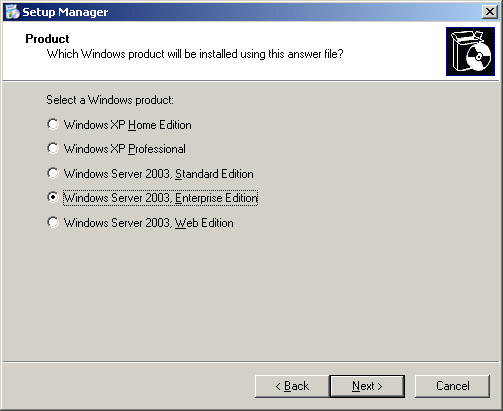
Select the Unattended setup option to create the unattend.txt answer file. Click Next to display the Product page, as shown in Figure 14-1-23:
-
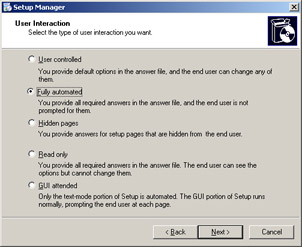
Select the Window Server 2003, Enterprise Edition option. Click Next to display the User Interaction page, as shown in Figure 14-1-24:
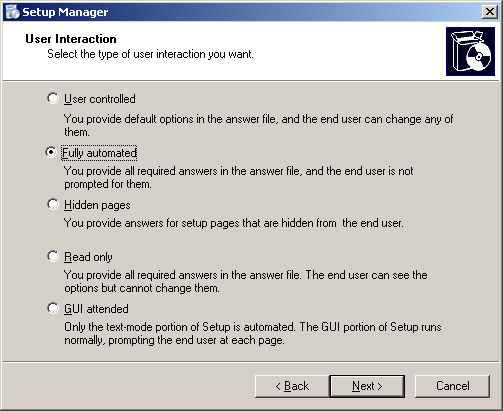
Figure 14-1-24: The User Interaction Page-
User controlled: Specifies that the information about the response to the default options for the setup pages is stored in the answer file, and the end user can change any of the options. This option performs the attended installation of Windows Server 2003.
-
Fully automated: Specifies that the information about the response to of the options for installing Windows Server 2003 is stored in the answer file, and the end user is not prompted for any option. This option performs the unattended installation of Windows Server 2003.
-
Hidden pages: Specifies the information about the response to the options for the setup pages that are hidden from the end user at the time of installing Windows Server 2003.
-
Read only: Specifies that the information about the response to the options is stored in the answer file in the read only mode. The end user can view the options but cannot change them.
-
GUI attended: Prompts the end user for the responses to the options at each page of the GUI mode of setup.
-
-
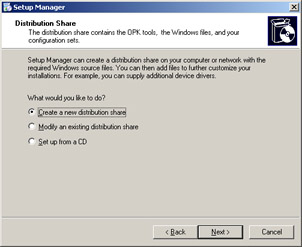
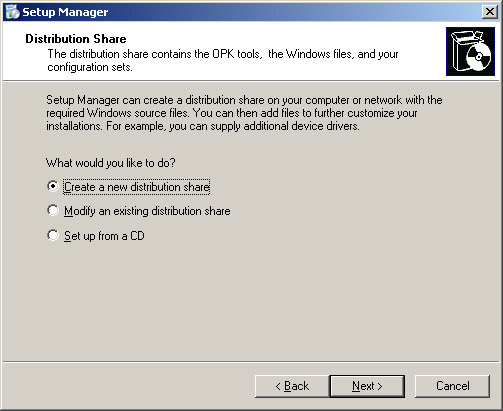
Select the Fully automated option, and click Next. The Distribution Share page appears, as shown in Figure 14-1-25:
-
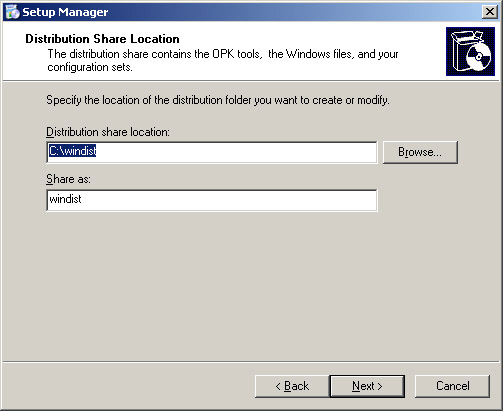
Select the Create a new distribution share option, and click Next. The Distribution Share Location page appears, as shown in Figure 14-1-26:
-
Click Next to display the License Agreement page.
-
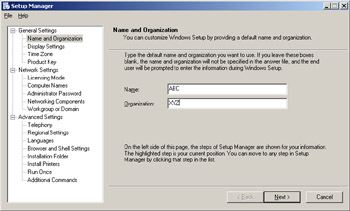
Select the I accept the terms of the License Agreement option, and click Next. The Setup Manager wizard is closed and the Setup Manager main window is displayed, as shown in Figure 14-1-27:
You can select a node, which specifies the optional system settings, from the Setup Manager main window. These settings specify the additional information required during the installation, and store them in the answer file. To specify optional settings of the operating system:
-
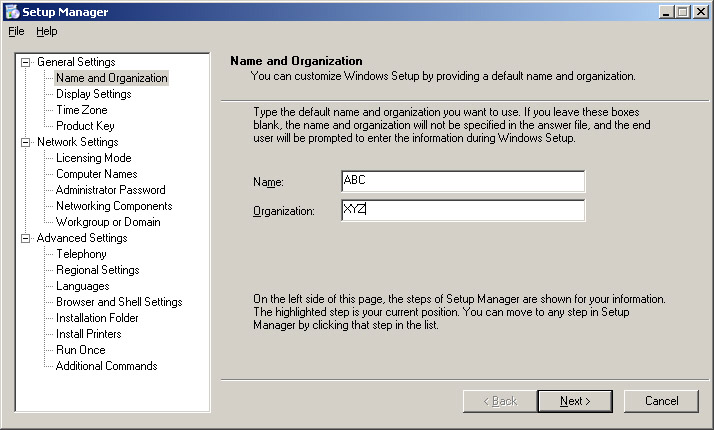
Specify the information about the name and organization that you want to store in the answer file. Otherwise, the end user needs to specify this information during the Windows setup.
-
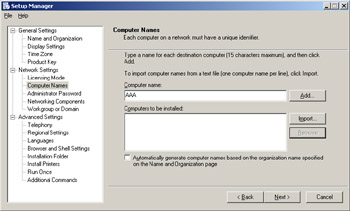
Select the Computer Names node from the Setup Manager main window to display the Computer Names page, as shown in Figure 14-1-28:
-
Select the Administrator Password node from the left side of the Setup Manager main window to display the Administrator Password page, as shown in Figure 14-1-29:
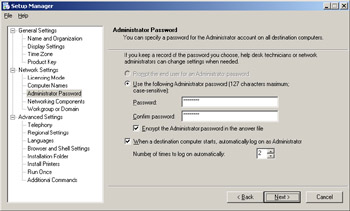
Figure 14-1-29: The Administrator Password PageNote You select the Encrypt the Administrator password in the answer file checkbox to store the password in the encrypted form.
-
Click Next after specifying values of optional settings. The Setup Manager prompts you to specify the name and location of the unattended answer file, as shown in Figure 14-1-30:
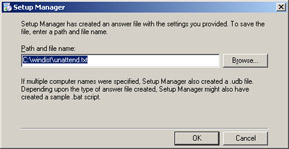
Figure 14-1-30: Specifying the Name and Path of the Unattended Answer File -
Click OK to copy all the installation files on your computer.
| Note | The Setup Manager wizard supports Windows NT 4.0 Service Pack 6 or later and Internet Explorer 5 or later. |
The Setup Manager wizard creates the unattend.txt file to perform the unattended installation of Windows Server 2003, as shown in Listing 14-1-1:
;SetupMgrTag
[Data]
AutoPartition=1
MsDosInitiated="0"
UnattendedInstall="Yes"
[Unattended]
UnattendMode=FullUnattended
OemSkipEula=Yes
OemPreinstall=Yes
TargetPath=\WINDOWS
[GuiUnattended]
AdminPassword=e52cac67419a9a224a3b108f3fa6cb6d8846f7eaee8fb117ad06bdd830b7586c
EncryptedAdminPassword=Yes
AutoLogon=Yes
AutoLogonCount=2
OEMSkipRegional=1
TimeZone=85
OemSkipWelcome=1
[UserData]
ProductKey=111114-111114-111114-111114-11111
FullName="ABC"
OrgName="XYZ"
ComputerName=AAA
[LicenseFilePrintData]
AutoMode=PerServer
AutoUsers=5
[SetupMgr]
DistFolder=C:\windist
DistShare=windist
[Identification]
JoinWorkgroup=WORKGROUP
[Networking]
InstallDefaultComponents=Yes
The above listing shows that the values of various settings of Windows setup are stored in the unattend.txt file. The Unattended setting specifies the mode of installation and location of the target computer. The SetupMgr setting specifies the name and location of the distribution share folder.
The Setup Manager wizard also creates a batch file, unattend.bat, during the creation of the unattend.txt file. The batch file specifies the location of the setup and answer files, and starts the unattended installation of Windows Server 2003. The client computer needs to access the distribution server before running the batch file because the distribution server stores the installation files. Listing 14-1-2 shows the content of the unattend.bat file:
@rem SetupMgrTag
@echo off
rem
rem This is a SAMPLE batch script generated by Setup Manager.
rem If this script is moved from the location where it was generated, it may have to be modified.
rem
set AnswerFile=.\unattend.txt
set SetupFiles=\\SERVER01\windist\I386
\\SERVER01\windist\I386\winnt32 /s:%SetupFiles% /unattend:%AnswerFile%
The above listing shows that the batch file contains the location of the unattend.txt and setup files.
To perform unattended installation of Windows Server 2003, you need to establish a connection with the distribution server before starting the batch file because all the setup files are stored in the distribution server. The syntax to initiate an unattended installation from a command line is:
Winnt32.exe /unattend [number]:[answer_file]
In the above syntax, the number parameter specifies the time taken by the setup, in seconds, for copying the installation files. The answer_file parameter specifies the name of the answer file.
Upgrading to Windows Server 2003 from Windows 2000 Server
You can upgrade an existing operating system to Windows Server 2003 because it provides various features, such as availability, security, and reliability. You cannot upgrade the Windows 9x operating systems to Windows Server 2003 because these are 16 bit operating systems.
At the time of upgrading, you need to ensure that the existing operating system must satisfy the prerequisites to install Windows Server 2003. When you upgrade the Windows 2000 Server operating system to Windows Server 2003, you should ensure that the Windows setup performs following tasks:
-
Does not change the existing user profiles and its location.
-
Does not change the registry settings of applications and drivers, because these are compatible with both the operating systems.
-
Does not change data stored in the Logical Disk Manager (LDM) database that contains information about the dynamic disks.
-
Does not change the NTFS files permission of Windows 2000 Server, because same permissions are required in Windows Server 2003.
-
Upgrades the current version of the Internet Explorer to IE 6.0 for improved security.
-
Upgrades the current version of IIS to IIS 6.0 for improved security.
-
Upgrades the network interfaces to Network Device Interface Specification (NDIS) 5.1, which uses memory more efficiently than the existing network interface and supports wireless adapters.
The upgrade process has two phases, initial assessment, and upgrade implementation. In the initial assessment phase, the Winnt32.exe installation utility retrieves information about the current installation and creates the Winnt.sif script file for upgrading. In the upgrade implementation phase, the Windows setup upgrades the operating system based on the Winnt.sif file.
You can upgrade an existing operating system to Windows Server 2003 from the CD or from the distribution share folder. If you upgrade the operating system from the CD, the Windows setup copies all the setup and operating system files in the \$win_nt$.~bt folder. These files occupy 6MB of storage space. If you upgrade the operating system from the distribution share folder, the Windows setup copies all the setup and operating system files in the $win_nt$.~ls folder. These files occupy 300 MB of storage space.
To upgrade Windows 2000 Server to Windows Server 2003:
-
Place the CD in the CD-ROM. The autorun feature of the Windows CD displays the Welcome to Microsoft(R) Windows(R) Server 2003 screen, as shown in Figure 14-1-31:
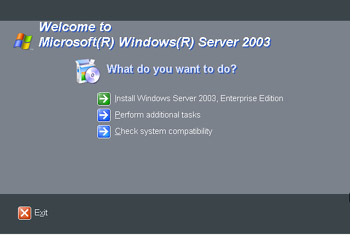
Figure 14-1-31: The Welcome to Microsoft(R) Windows(R) Server 2003 Screen -
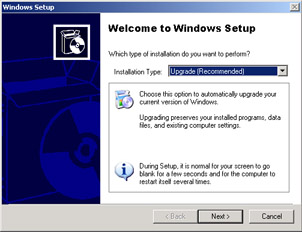
Select the Install Microsoft Windows Server 2003, Enterprise Edition option to start the upgrade. The Windows setup runs the Winnt32.exe installation utility. The Welcome to Windows Setup page of the Windows Setup window appears, which contains the installation Type list box, as shown in Figure 14-1-32:
-
Select the Upgrade (Recommended) option from the Installation Type list box to initiate the upgrade process.
-
Click Next to display the License Agreement page.
-
Select the I Accept the Agreement option to continue the installation process.
-
Click Next to display the Product Key page. Enter the 25-character product key provided on the back of the CD cover.
-
Click Next to copy the boot files of Windows Server 2003 to the \$win_nt$.~bt folder.
After copying the files to the \$win_nt$.~bt folder, the Windows setup copies the drivers from the \$win_nt$.~ls folder or from the CD to the computer. The Windows setup then installs the network devices, protocols, and register components.
Troubleshooting the Installation of Windows Server 2003
The installation process of Windows Server 2003 may stop due to several errors. Table 14-1-3 describes the causes of and solutions to the errors that might halt the installation process:
| Error Message | Reason | Solution |
|---|---|---|
| CD-ROM or Media Error | The CD-ROM is not detected or unavailable. | Replace the CD-ROM. |
| Insufficient Memory | The computer does not meet the minimum memory requirements. | Add more memory to the computer, at least 128 MB. |
| Dumping Physical Memory | The Cache Shadow option in the BIOS might be enabled. | Disable the Cache Shadow option in the BIOS. |
| Insufficient Disk Space | The hard disk is not partitioned. | Create a new partition. |
| Failure to Connect to the Domain Controller | The domain controller or DNS service may not be running. The domain name may not be correct or the protocol settings may not be properly set. | Verify that the domain controller and DNS service are running, the domain name is correct and the protocol settings are properly set. |
| Service Fail to Start | The network services are not enabled. | Verify that the protocols and adapters are installed in the computer. |

