Dynamic Host Configuration Protocol (DHCP) is a useful protocol for managing a large computer network. It enables you to dynamically allocate IP addresses to host computers on a network rather than manually configuring these settings. Using DHCP, you can also propagate information such as a DNS address, the subnet mask, and the default gateway address.
This ReferencePoint describes how to use DHCP in Linux environment, including IP address allocation models, communication, and message formats. It also explains how to install and configure DHCP.
IP Address Allocation Models in DHCP
DHCP supports three IP address allocation models: manual, automatic, and dynamic.
Manual IP Address Allocation Model
Using manual IP address allocation, also called static allocation, you need to create a map of the physical and IP addresses on the DHCP server. If the network is small enough to manage, you can manually allocate IP addresses.
Automatic IP Address Allocation Model
When using automatic IP address allocation, you need to configure the pool of IP addresses allocated by the DHCP server. An IP address is permanently allocated to a client and does not change until you reconfigure the server. You can use automatic allocation when hosts are permanently connected to the network and there are enough IP addresses for all hosts.
Dynamic IP Address Allocation Model
If you use the dynamic IP address allocation model, the DHCP server leases IP addresses to clients instead of permanently allocating them. This model is useful when the number of IP addresses available is less than the number of hosts on the network. Dynamic allocation enables the reuse of IP addresses when a host is removed from the network. You can use dynamic IP address allocation when clients share the network temporarily.
Messages in DHCP
DHCP defines various types of messages used by the DHCP server and client to allocate IP addresses. Table 4-5-1 lists the messages required in the DHCP client/server communication:
| DHCP Message | From | To | Description |
|---|---|---|---|
| DHCPDISCOVER | Client | Server | Locates all the servers available on the network. |
| DHCPOFFER | Server | Client | Sends a reply to the DHCPDISCOVER message and contains configuration parameters. |
| DHCPREQUEST | Client | Server | Requests parameters form the server. |
| DHCPACK | Serve | Client | Includes the requested parameters along with the address of the computer system in the network. |
| DHCPNAK | Server | Client | Indicates that the client lease is expired. |
| DHCPDECLINE | Client | Server | Indicates that the network address is already in use. |
| DHCPRELEASE | Client | Server | Indicates that the client has left its address and the lease is finished. |
| DHCPINFORM | Client | Server | Obtains the local parameters from the server. |
DHCP Message Format
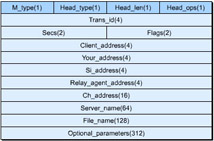
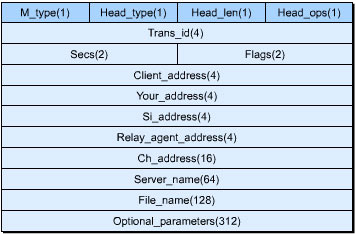
A DHCP message contains the fixed and variable length parts. The fixed length part contains mandatory fields while the variable length part specifies additional options. The server that receives the message determines the type of information from the number sequence. The last option of the variable length portion is always the end option. Figure 4-5-1 shows a DHCP message format:
Table 4-5-2 describes various fields in a DHCP message:
| Field | Octets | Description |
|---|---|---|
| M_type | 1 | Defines the message type as a request or a reply. |
| Trans_id | 4 | Defines a random number selected by the client to associate response and reply between the server and the client. |
| Client_address | 4 | Defines the client IP address. |
| Your_address | 4 | Defines your IP address. |
| Relay_agent_address | 4 | Defines the relay agent IP address. |
| Server_name | 64 | Defines the server name and is optional. |
| File_name | 128 | Defines the boot file name. |
| Optional_parameters | Variable | Defines the optional parameters required. |
| Head_type | 1 | Defines the type of hardware address. |
| Head_len | 1 | Defines the length of hardware address. |
| Secs | 2 | Defines the time, in seconds, elapsed since a client acquires an address. |
| Flags | 2 | Defines the flag settings. |
| Ch_address | 16 | Defines the hardware address of the client. |
| Si_address | 4 | Defines the IP address of the next server to be used in other processes. |
Communication in DHCP
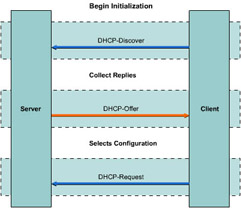
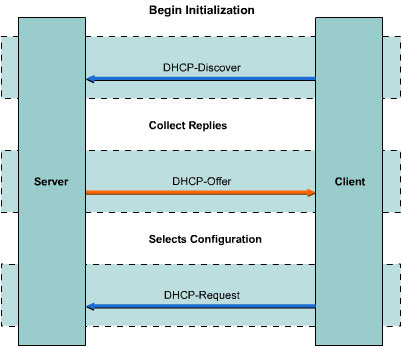
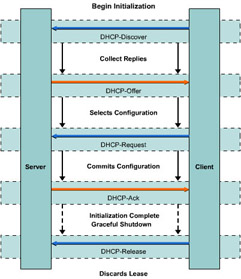
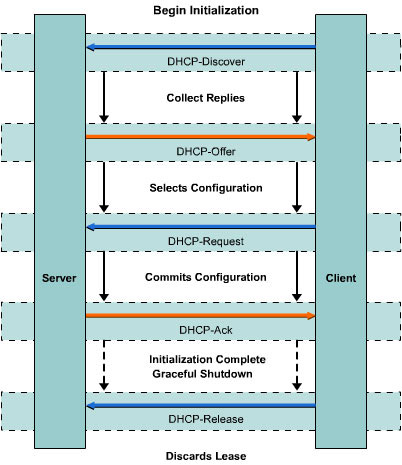
The DHCP client first requests service and retransmissions from the DHCP server. The DHCP server acknowledges this request. Every lost acknowledgement is followed by a retransmission request. Figure 4-5-2 shows the exchange of messages between the DHCP client and the DHCP server:
Allocating the IP Address
To acquire an IP address, the DHCP client communicates with the DHCP server.
In the initial phase, the DHCP client needs the IP address and network configuration parameters, such as the subnet address group. The DHCP client broadcasts the DHCPDISCOVER message with the physical address on the network. In this phase, the DHCP server communicates with the DHCP client using the physical address.
The DHCP server checks for the availability of an IP address after receiving the DHCPDISCOVER message. If the IP address is available, the DHCP server generates and sends the DHCPOFFER message with the IP address and other network configuration parameters.
More than one DHCP server on the network may send the DHCPOFFER message to the requesting DHCP client that selects one of these offers. This phase is called the Selection phase. The DHCP client generates and broadcasts the DHCPREQUEST message with the selected IP address.
The selected DHCP server acknowledges the DHCPREQUEST message with the DHCPACK message, which indicates a lease of the IP address. As a result, the DHCP client broadcasts an Address Resolution Protocol (ARP) request on the network to ensure that the allocated IP address is authentic. After the authenticated IP address is verified, the DHCP client is configured based on the settings received from the DHCP server. This phase is called the Binding phase.
Figure 4-5-3 shows the DHCP client/server state diagram during the IP address allocation process:
If the DHCP client reboots after acquiring the IP address, the DHCP client needs to reacquire the IP address and other settings from the DHCP server that leases the IP address.
The DHCP client sends the DHCPREQUEST message to the DHCP server that leases the IP address. If the DHCP server still contains the entry of the DHCP client in the state table, the server returns the DHCPACK message. Otherwise, the DHCP server returns the DHCPNAK message. The DHCP client updates its network configuration settings after receiving the DHCPACK message. If the DHCP client receives the DHCPNAK message, it restarts the process of acquiring a new IP address.
Renewing the IP Address
To renew the IP address, the DHCP client sends the DHCPREQUEST message directly to the DHCP server, which in turn returns the DHCPACK message. The DHCP client updates the lease information after receiving the DHCPACK message. If the DHCP server is unavailable, the DHCP client waits until 87.5 percent of the lease time is expired. The DHCP client broadcasts the DHCPREQUEST message if the DHCP server is still unavailable. Another DHCP server may renew the lease if that server contains the lease information. If no DHCP server on the network responds to the broadcast, the DHCP client needs to reacquire the IP address.
Installing the DHCP Server on Linux
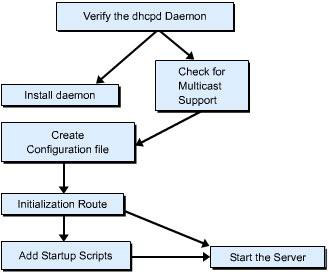
Before you install the DHCP server, be sure that a dhcpd daemon is on the computer and that there is multicast support on the server. You can create the configuration file for the server in the etc directory with various configuration parameters. You also need to add startup scripts before running the server. Figure 4-5-4 shows how to install DHCP on a network:
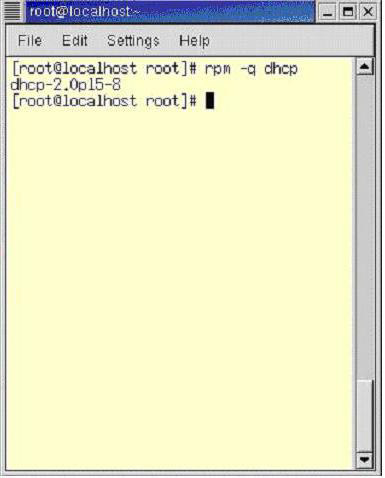
You can verify the presence of the dhcpd daemon on the server using any of the following commands:
rpm -q dhcp
ls /etc/rc.d/init.d
which dhcpd
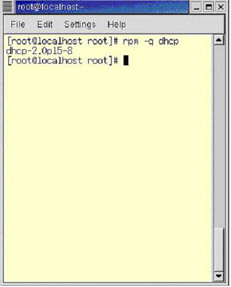
Figure 4-5-5 shows how to verify the DHCP daemon using the rpm command:
The rpm command also verifies the version of the DHCP server installed on the system. If the system does not have the dhcpd daemon, install it using the following commands:
mount /mnt/cdrom
rpm -Uvh /mnt/cdrom/RedHat/RPMS/dhcp-*.rpm
umount /mnt/cdrom
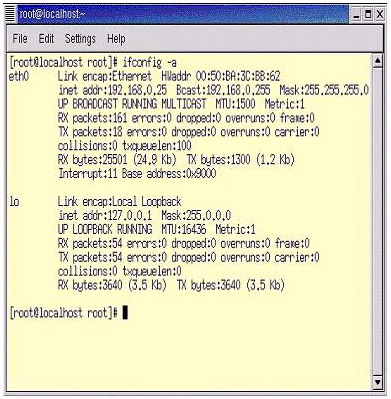
You also need to verify for the multicast support in the kernel using the following command:
ifconfig -a
If you do not have the multicast support built into the kernel, recompile the kernel. Figure 4-5-6 shows the multicast support for DHCP:
Creating the Configuration File
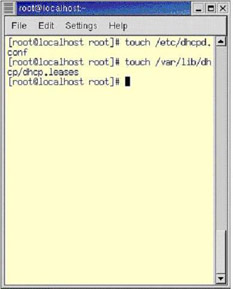
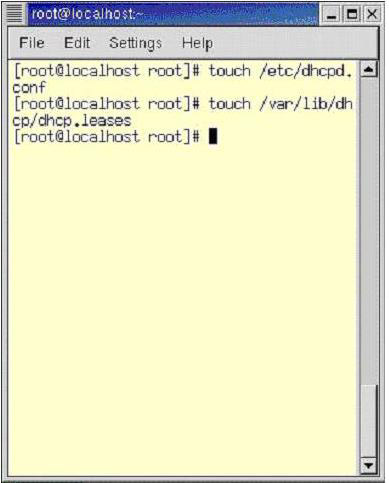
You need to create dhcpd.conf and dhcpd.leases files to run the dhcpd daemon properly. The dhcpd.conf file contains configuration parameters and the dhcpd.leases file contains the IP address allotted to the computer systems in the network.
Commands to create the dhcpd.conf in RedHat 7.x are:
touch /etc/dhcpd.conf
mkdir /var/lib/dhcp
The command to create the dhcpd.leases in RedHat 7.x is:
touch /var/lib/dhcp/dhcpd.leases
Figure 4-5-7 shows how to create the dhcpd.conf and dhcpd.leases files:
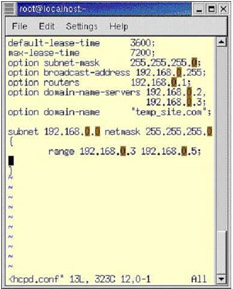
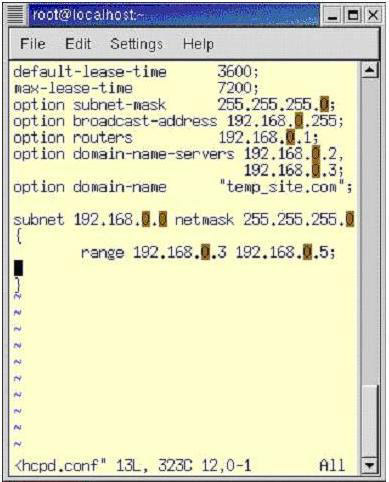
If you replace an old DHCP server, its dhcpd.leases file is maintained as a new dhcpd.leases file. After you create the dhcpd.leases file, the dhcpd daemon refers to this file for any further allocation. You can create the dhcpd.conf file based on the requirements of the network. Listing 4-5-1 shows the code for the entries of a sample dhcpd.conf file:
default-lease-time 3600;
max-lease-time 7200;
option subnet-mask 255.255.255.0;
option broadcast-address 192.168.8.255;
option routers 192.168.8.8;
option domain-name-servers 192.168.8.80, 192.168.8.99;
option domain-name "temp_site.com";
subnet 192.168.8.0 netmask 255.255.255.0 {
       range 192.168.8.50 192.168.8.100;
}
Lease times are mentioned in seconds. If you need to set up the DHCP server to support more than one subnet, you need to create a subnet entry for each subnet in the dhcpd.conf file. For example, to lease IP addresses to the subnets 192.168.9.0 and 192.168.10.0, the dhcpd.conf file contents should be as shown in Listing 4-5-2:
default-lease-time 3600;
max-lease-time 7200;
option subnet-mask 255.255.255.0;
option broadcast-address 192.168.8.255;
option routers 192.168.8.1;
option domain-name-servers 192.168.8.100, 192.168.8.110;
option domain-name "temp_site.com";
option netbios-name-servers 192.168.8.20;

subnet 192.168.9.0 netmask 255.255.255.0 {
       range 192.168.9.50 192.168.9.200;
}
subnet 192.168.10.0 netmask 255.255.255.0 {
       range 192.168.10.50 192.168.10.200;
}
Figure 4-5-8 shows how to edit the DHCP.conf file:
Adding the Route
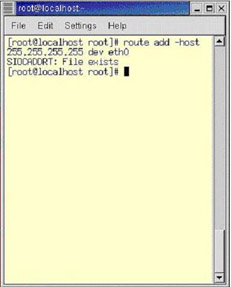
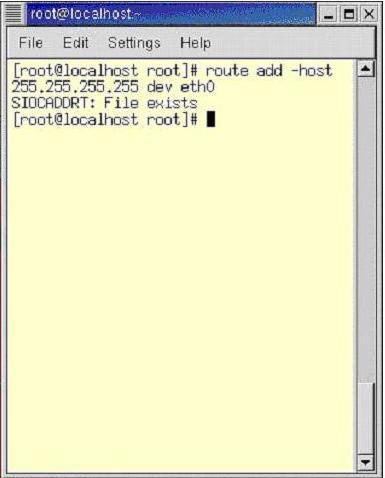
You can adjust the routing tables to serve Windows clients using the DHCP server. The command to adjust routing tables is:
route add -host 255.255.255.255 dev eth0
Add the above command at the end of the /etc/rc.d/rc.local file so the route is added back automatically when you reboot the server.
For multiple subnets, you need to make the following entries in the same routing table entry for each Ethernet card:
route add -host 255.255.255.255 dev eth0
route add -host 255.255.255.255 dev eth1
Figure 4-5-9 shows how to add the route:
Adding Startup Scripts
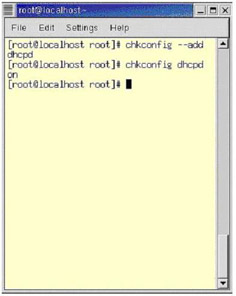
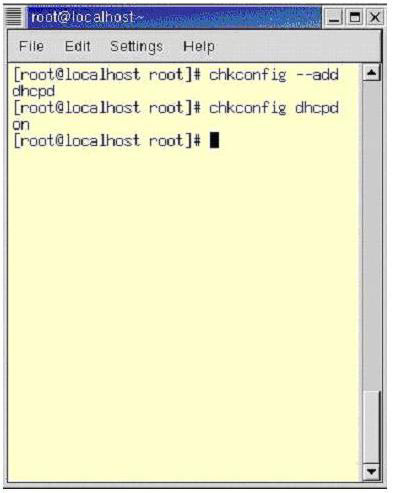
You need the chkconfig utility to start the DHCP server automatically during the system startup. The chkconfig utility adds the following scripts to various run levels:
chkconfig --add dhcpd
chkconfig dhcpd on
Figure 4-5-10 shows how to execute the chkconfig command:
Starting and Stopping the DHCP Server
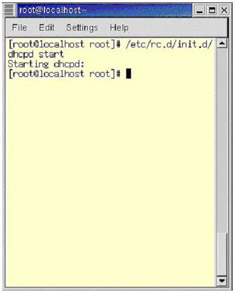
You can start the dhcpd daemon using the following command:
/etc/rc.d/init.d/dhcpd start
The command to start the DHCP server is:
/sbin/service dhcpd start
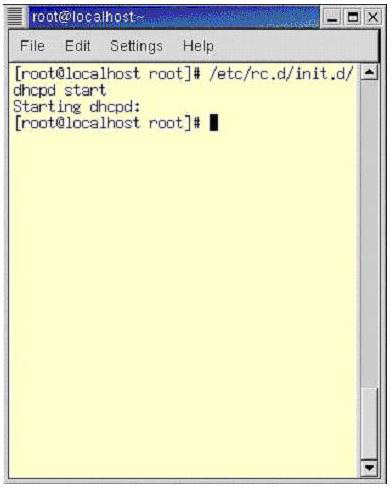
Figure 4-5-11 shows the output of the command to start the DHCP server:
You can stop the DHCP server using the following command:
/etc/rc.d/init.d/dhcpd stop
Alternatively, you can use the following command to stop the DHCP server:
/sbin/service/dhcpd stop
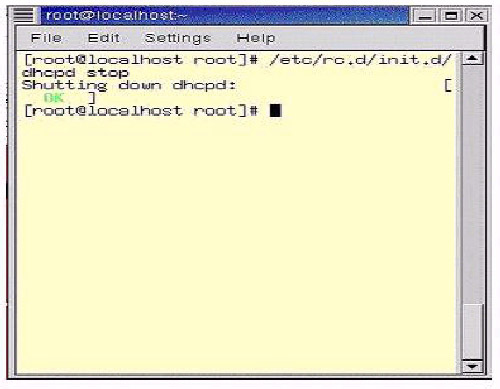
Figure 4-5-12 shows the output of the command to stop the DHCP server:
You can restart the DHCP server using the following command:
/etc/rc.d/init.d/dhcpd restart
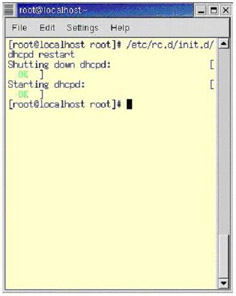
Figure 4-5-13 shows the output of the command to restart the DHCP server:
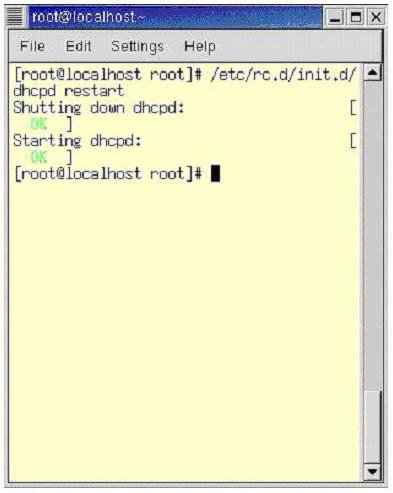
Figure 4-5-13: Restarting the DHCP Server
Configuring the DHCP Server on Linux
You can configure the DHCP server using the /etc/dhcpd.conf configuration file, which stores information about DHCP clients. You can declare various options in this file.
The Configuration File
The configuration file contains extra lines in addition to various tabs for easier formatting. The file contains comment entries with the # symbol.
Entries in the configuration file are either declarations or parameters. Declaration statements in the configuration file describe DHCP clients and their addresses. It also includes statements that mention application of more than one parameter to a group of DHCP clients. Parameter statements describe how and when to perform a task and various network declarations that you need to send to DHCP clients.
A configuration file includes entries for the DHCP server setup and values are included using structures. These structures include global values available to the code written below it.
Subnet Declaration
Subnet declaration defines the router, subnet mask, domain name, and the DNS. Listing 4-5-3 shows the declaration of the subnet structure required in the dhcpd.conf file:
Shared Network Declaration
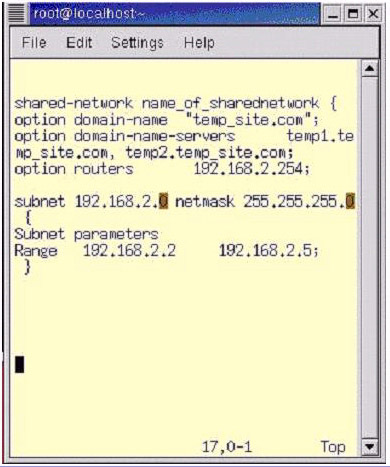
The shared network declaration includes entries of all subnets that reside in the same physical network. The global declaration section contains all the parameters declared in this section but outside any subnet declaration. Listing 4-5-4 shows the declaration of the shared network structure required in the dhcpd.conf file:
shared-network name_of_sharednetwork {
option domain-name      "temp_site.com";
option domain-name-servers      temp1.temp_site.com, temp2.temp_site.com;
option routers   192.168.2.254;
subnet 192.168.2.0 netmask 255.255.255.0 {
Subnet parameters
Range 192.168.2.20 192.168.2.60;
}
subnet 192.168.2.88 netmask 255.255.255.0 {
Subnet parameters
Range 192.168.2.45 192.168.2.99;
}
}
Figure 4-5-14 shows the shared network declaration in the dhcpd.conf file:
Group Declarations
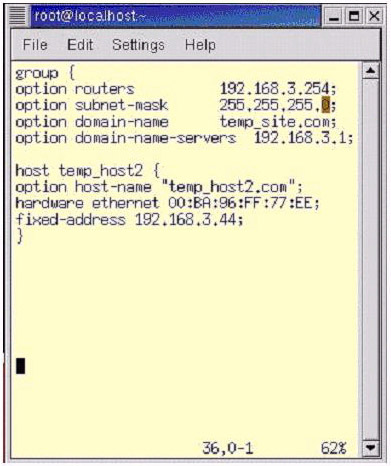
Group declarations enable you to assign global parameters to declare the group structure. Listing 4-5-5 shows how to declare the group structure required in the dhcpd.conf file:
group {
option routers                    192.168.3.254;
option subnet-mask              255.255.255.0;
option domain-name             "temp_site.com";
option domain-name-servers       192.168.3.1;
host temp_host2 {
option host-name "temp_host2.com";
hardware ethernet 00:BA:96:FF:77:EE;
fixed-address 192.168.3.44;
}
host temp_host3 {
option host-name "temp_host3.com";
hardware ethernet 00:C4:FF:69:E9:AB;
fixed-address 192.168.3.86;
}
}
Figure 4-5-15 shows the group declaration in the dhcpd.conf file:
Range Parameters
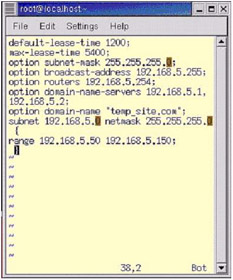
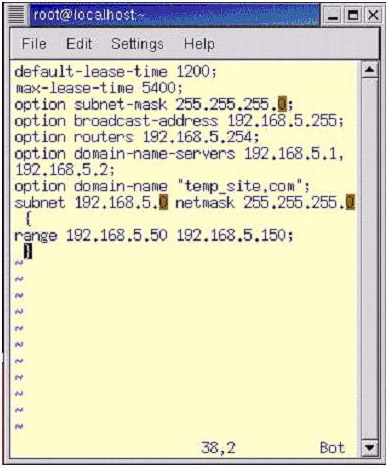
DHCP server needs range parameters to allocate a dynamic IP address to a computer system on a network. Listing 4-5-6 shows how to declare range parameters in the dhcpd.conf file:
default-lease-time 1200;
max-lease-time 5400;
option subnet-mask 255.255.255.0;
option broadcast-address 192.168.5.255;
option routers 192.168.5.254;
option domain-name-servers 192.168.5.1, 192.168.5.2;
option domain-name "temp_site.com";
subnet 192.168.5.0 netmask 255.255.255.0 {
range 192.168.5.50 192.168.5.150;
}
Figure 4-5-16 shows the range parameters declaration in the dhcpd.conf file:
Obtaining the Static IP Address Using DHCP
You can use the hardware Ethernet parameter within the host declaration when a computer in a network needs an IP address based on the Media Access Control (MAC) address of the network interface card. The host name can also be assigned to any DHCP client in the network. The following code shows how to declare the structure host in the dhcpd.conf file:
host temp_host {
option host-name "temp_host.default.com";
hardware ethernet 00:CA:54:9E:9E:FD;
fixed-address 192.168.6.64;
}
The Lease Database
DHCP stores the lease database for clients in the /var/lib/dhcp/dhcp.leases file that updates itself by storing the information about recently assigned IP addresses. The content of this file includes lease duration; the start and the end date of the lease; and the MAC address of the network interface card through which the lease information is retrieved.
You need to recreate the lease database frequently to keep a check on the database size. You can rename the old file and the new file to the original file name to replace the old lease database with a new one. If the DHCP daemon is destroyed during the process, rename the old file to the original one.
| Note | The dhcpd.leases file should exist before starting the server. You can use the touch var/lib/dhcp/dhcpd.leases command to create the file. |
Various Options that can be Specified in /etc/sysconfig/dhcpdm are:
-
-p
: Defines the port number where dhcpd should listen. The default port is 67. The DHCP server transmits responses to clients at a port whose number is greater by one than the number of the receiver port. -
-d: Logs dhcpd to the standard error descriptor.
-
-f: Runs dhcpd as the foreground process.
-
-q: Stops message printing on daemon startup.
-
-lf filename: Indicates the location of the lease database file.
-
-cf filename: Indicates the location of the configuration file.
The Relay Agent
The relay agent relays DHCP messages from one subnet without the server to various DHCP servers on other subnets. The relay agent forwards a client request to all the servers in the list. After receiving the response, the message is sent in the unicast mode to the subnet from where the request was made. The DHCP relay agent listens to all interfaces by default.
You can start the DHCP relay agent using the dhcprelay command. The command accepts server names to which the message should be relayed. Various options to start a DHCP relay agent are:
-
-q: Runs the DHCP relay in the foreground.
-
-I: Indicates the network interface to be configured. By default, all interfaces are considered.
-
-p: Indicates the port where the DHCP relay agent listens. The DHCP relay agent transmits at a port number, which is one greater than the port number at which the DHCP relay agent listens.
-
-d: Disables message printing on startup.
Configuring the DHCP Client
You can configure the DHCP client on a computer if the DHCP client recognizes the network interface card. The network interface card can be checked at initialization time. You can configure the DHCP client manually by modifying the /etc/sysconfig/network file. This modification initializes the networking and configuration file for each network device in the /etc/sysconfig/network-scripts directory. In this directory, each device should have a configuration file named ifcfg-eth0, where eth0 is the name of a network device.
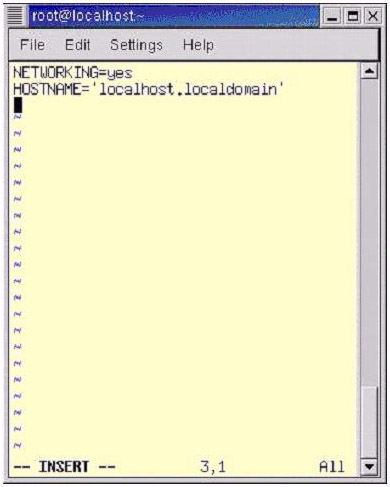
The /etc/sysconfig/network file must include the following entry:
NETWORKING=yes
Figure 4-5-17 shows the /etc/sysconfig/network file:
DEVICE=eth0
BOOTPROTO=dhcp
ONBOOT=yes
Figure 4-5-18 shows the /etc/sysconfig/network-scripts/ifcfg-eth0 File:

