Hello after a long period GNS3 released a Host add on to GNS3 Follow the steps for adding the host in GNS3 using QEMU Bin file First My OS is win 7
Step 1:
Download this 2 file from Server
Qemuwapper.exe
linux-microcore-2.10.img
You can find it at http://sourceforge.net/projects/gns-3/
Step 2:
After download Place the File in GNS3 Install Folder
Generally in C:\Programs Files\GNS3\
Step 3
Open GNS3
Sudo ifconfig eth0 192.168.1.2
Step 4:
Go to Preference
Go To QEMU
Click Test
Step 5:
Go to QEMU Host
Add the Following
Identifiers Name: Microcore
Binary Name: linux-microcore-2.10.img
Show the Path where we download the linux-microcore-2.10.img from net (best is save in IOS Image Folder)
RAM: 32
NIC: e1000
Qemu Optional: -no-acpi
for Tiny_core:
Setup new image with following properties
- Identifier: tiny_core
- image: local path to linux-tinycore-2.11.5.img
- Memory: 64 MB
- NIC: e1000
- Qemu options: -no-acpi
Click: Save configuration
Apply and OK
That it
Drag and Drop the Host from the list if need drop a router and connect the host to router that it
If everything is fine Pc will work
Start
Right Click Host and Start
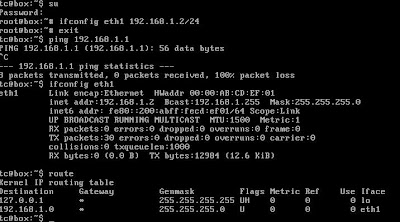
one the Pc Boot this is command
Username: Root password is root
Sudo ifconfig eth0 192.168.1.2
Ping 192.168.1.1

Gr8 !!!!!!!!!!!!!!!!! it works
Commands refer to BusyBox packet: http://www.busybox.net


